Homemade Ice Cream Storage & Texture Problems: How to Keep It Creamy and Fresh
Homemade ice cream can taste rich and smooth when it first comes out of the machine, yet become hard, icy, grainy, or dry after a few days. That change can be frustrating, especially after spending time making a good batch. The good news is that most Homemade Ice Cream Storage & Texture Problems have clear causes and practical fixes.
The key is to protect the tiny ice crystals that formed during churning. A cold, steady freezer, a well-sealed container, and fast storage can help keep those crystals small. The recipe also matters, since the balance of water, sugar, fat, and other ingredients affects how the finished ice cream behaves.
For a typical U.S. home freezer, storage habits matter more than many people expect. The freezer door often warms up during normal use, so placing homemade ice cream in a stable area toward the back can help. Good storage will not fix a poor base, but it can prevent a good batch from becoming rough and icy.
Why Homemade Ice Cream Develops Texture Problems
Homemade ice cream has a simple goal: create many small ice crystals and keep them small. When water freezes, it forms ice crystals. If those crystals grow too large, the ice cream feels icy instead of smooth.
Temperature changes are a major cause of crystal growth. When ice cream partly melts and then freezes again, water can move and form larger crystals. This is why repeated trips from the freezer to the counter can damage texture over time.
The recipe also plays a major role in Homemade Ice Cream Storage & Texture Problems. Sugar lowers the freezing point, while fat and milk solids add body. If a recipe has too much water or too little sugar, fat, or stabilizing ingredients, it may freeze harder or become more icy.
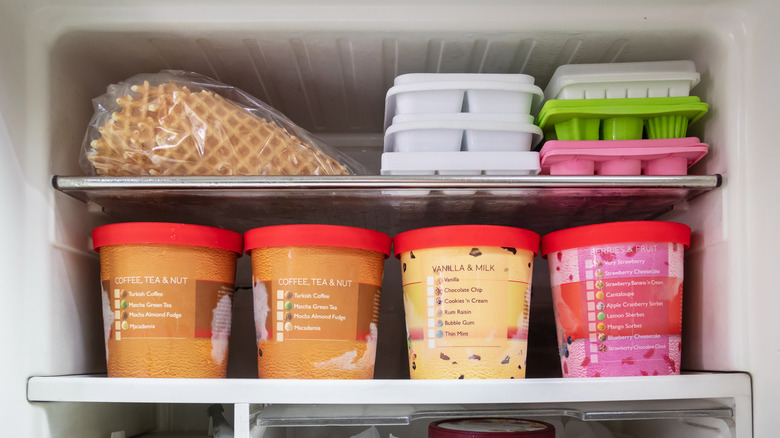
Another common issue is air exposure. Air in the container allows moisture to move and can contribute to freezer burn. A tight lid and a container that fits the batch well can reduce this problem.
- ✦ Large ice crystals
Large crystals create an icy, coarse mouthfeel. They often grow after slow freezing or repeated thawing and refreezing.
- ✦ Temperature swings
Frequent warming and cooling gives water more chances to move and form larger crystals.
- ✦ Too much free water
A recipe with a high water content may freeze harder and develop more ice crystals.
- ✦ Too much air
An open or poorly sealed container can expose the surface to dry freezer air and cause freezer burn.
The Role of Freezing Speed
Fast freezing usually creates smaller ice crystals. A pre-chilled freezer bowl, cold base, and properly chilled ice cream maker can help the mixture freeze faster during churning.
After churning, move the ice cream into the freezer without delay. The goal is to reduce the time the mixture spends in a partly frozen state.
- ✦ Chill the base well
A thoroughly chilled base enters the freezing stage faster and places less work on the machine.
- ✦ Pre-chill the storage container
A cold container can help the freshly churned ice cream stay cold while it goes into the freezer.
How to Store Homemade Ice Cream for the Best Texture
Good storage starts as soon as churning ends. Transfer the ice cream to a clean, freezer-safe container and smooth the surface. A shallow container works well because it allows the ice cream to freeze through more evenly.
Choose a container with a tight lid. Avoid leaving a large empty space above the ice cream because the extra air can promote freezer burn and surface drying. If the container is larger than the batch, press a piece of freezer-safe parchment or plastic wrap directly against the surface before closing the lid, when appropriate for the product and container.
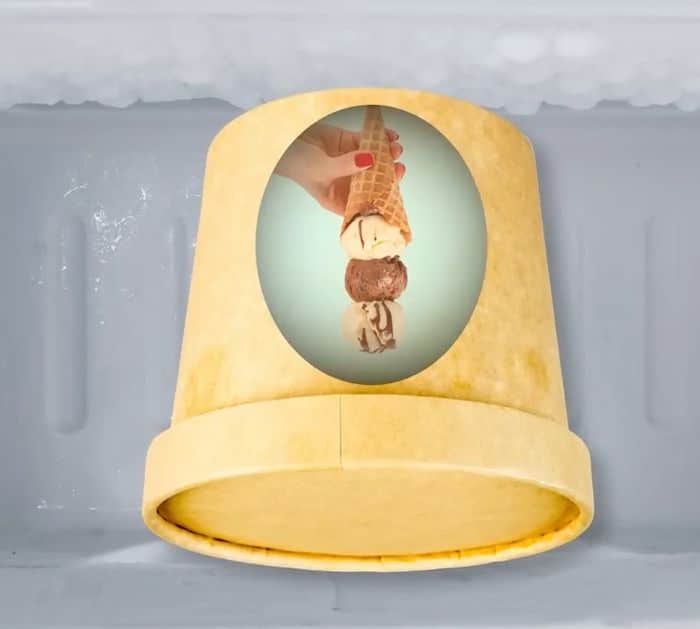
Keep the container in the back or center of the freezer rather than the door. The freezer door experiences more temperature change during normal use. Stable cold conditions are one of the simplest ways to reduce Homemade Ice Cream Storage & Texture Problems.
Do not store homemade ice cream beside foods with strong odors unless the container seals very well. Ice cream contains fat, and fat can pick up unwanted smells from the freezer.
- ✦ Use a shallow container
A shallow, freezer-safe container helps the ice cream freeze more evenly and makes serving easier.
- ✦ Seal it tightly
A tight lid limits air exchange and helps protect the surface from freezer burn.
- ✦ Leave little empty space
Less air above the ice cream means less room for moisture loss and surface damage.
- ✦ Store it in a stable spot
The back or center of the freezer is usually more stable than the door.
- ✦ Label the container
Write the flavor and date on the container so older batches get used first.
What Container Is Best for Homemade Ice Cream?
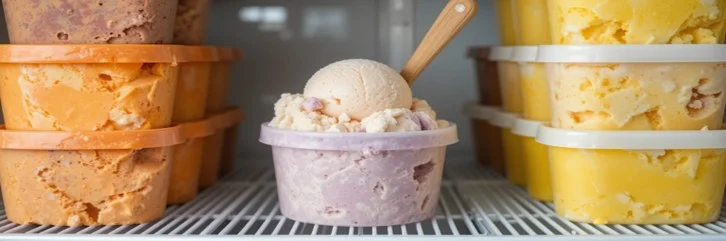
A freezer-safe, airtight container is the main requirement. Plastic ice cream tubs, food-safe reusable containers, and other containers made for freezing can all work when they seal well.
Very deep containers can make freezing and scooping less convenient. A wider, shallower container often gives better control over portion size and surface exposure.
- ✦ Best basic choice
Use a clean, freezer-safe container with a tight-fitting lid.
- ✦ Avoid weak seals
A loose lid allows cold, dry air to reach the ice cream and can increase freezer burn.
How to Fix Icy Homemade Ice Cream
Icy ice cream is one of the most common Homemade Ice Cream Storage & Texture Problems. It usually means the finished product contains large ice crystals or has too much unfrozen water for its recipe and storage conditions.
If the ice cream was smooth on day one but icy later, storage is a strong suspect. Repeated thawing, a warm freezer, poor sealing, or a container with too much empty space can let crystals grow.
If the ice cream was icy immediately after freezing, look at the recipe and process. A high-water base, low sugar level, low fat content, weak solids balance, or slow freezing can all contribute.
Do not try to fix a badly icy batch by leaving it on the counter until it becomes soft and then refreezing it. That cycle can create even larger crystals. Instead, focus on preventing the problem in the next batch.

- ✦ Chill the base before churning
A colder starting mixture can freeze more quickly during churning.
- ✦ Freeze promptly after churning
Do not let freshly churned ice cream sit at room temperature for long.
- ✦ Keep the freezer cold and stable
Avoid frequent temperature swings and do not overload the freezer in a way that blocks normal cold air flow.
- ✦ Review the recipe balance
Check the amount of sugar, dairy solids, fat, and water before changing individual ingredients.
Why Ice Crystals Grow During Storage
Ice crystals can change size even while the ice cream remains frozen. Small crystals can lose water, while other crystals gain water and become larger. Temperature changes make this process easier.
This is why stable storage matters so much. A container that protects the surface and a freezer that stays consistently cold can help preserve the texture you created during churning.
- ✦ Warm spots matter
Areas near the freezer door or front can experience more temperature change than areas farther inside.
- ✦ Partial melting causes trouble
When ice cream softens and then freezes again, the resulting crystals can become larger and easier to notice.
Why Homemade Ice Cream Becomes Hard and Difficult to Scoop
Some homemade ice cream freezes much harder than commercial ice cream. That does not always mean something went wrong. Commercial products often use carefully balanced recipes and processing methods that help control freezing and serving texture.
Homemade ice cream can become especially hard when it has a high water content or a lower amount of sugar, fat, or dissolved solids. A very cold freezer can also make a well-made batch feel firm when first removed.
For better serving texture, let the container sit at room temperature for a short period before scooping. The exact time depends on the freezer, container size, and recipe, so watch the surface rather than following one fixed number.
Do not repeatedly leave the whole container out until it becomes soft. Take only the amount you plan to eat and return the main container to the freezer quickly.
- ✦ High water content
More water means more ice forms, which can make the finished dessert harder.
- ✦ Low sugar
Sugar helps lower the freezing point. A lower amount can result in a firmer frozen product.
- ✦ Low fat or solids
Fat and milk solids add body and reduce the amount of water that forms large ice crystals.
- ✦ Very cold storage
A very cold freezer can make almost any homemade ice cream feel harder straight from storage.
How to Make Homemade Ice Cream Easier to Scoop
Use a good recipe with a balanced amount of sugar, dairy, and water. For serving, allow a small portion to soften briefly rather than warming the entire container.
A wide, shallow container can also make scooping easier. It reduces the depth of the frozen block and gives you more control when serving.
- ✦ Scoop only what you need
This keeps the main container colder and reduces repeated thawing.
- ✦ Use a warm scoop
A clean scoop warmed with water can cut through firm ice cream more easily. Dry it before scooping.
Grainy, Sandy, or Gritty Homemade Ice Cream
A grainy or sandy texture can have more than one cause. Some batches develop small sugar crystals, while others contain ice crystals or dairy solids that did not stay fully dissolved.
Sugar-related graininess can happen when sugar crystallizes during cooking or storage. This problem is different from ordinary iciness, so it helps to notice whether the texture feels like tiny sugar grains or like cold water crystals.
Dairy-based recipes can also become grainy when milk proteins or other solids react poorly to heat or acidity. Ingredients such as certain fruit purees, citrus juices, and acidic mix-ins can change the texture of a dairy base.
The best fix depends on the cause. Good ingredient handling, proper cooking, thorough chilling, and a balanced recipe can prevent many of these Homemade Ice Cream Storage & Texture Problems.
- ✦ Sugar crystals
These feel like tiny grains on the tongue and may develop when dissolved sugar recrystallizes.
- ✦ Ice crystals
These feel cold and icy rather than like dry grains of sugar.
- ✦ Dairy solids
Poor heating or an acidic mixture can sometimes cause dairy proteins to form unwanted particles.
- ✦ Poor mixing
Some ingredients need thorough blending so the final base has an even structure.
How to Tell Icy Texture From Sugar Graininess
Icy ice cream tends to feel cold, wet, and crunchy. Sugar graininess often feels more like fine sand and can remain noticeable even as the ice cream begins to melt.
This simple texture check can help you choose the right solution. If the problem appears mainly after several days in the freezer, storage is more likely to be involved. If it appears from the start, examine the recipe and preparation steps.
- ✦ Icy
Usually points toward ice crystal growth, excess free water, or temperature changes.
- ✦ Sandy
May point toward sugar crystallization or certain dairy-solids issues.
Freezer Burn, Dry Surfaces, and Flavor Changes
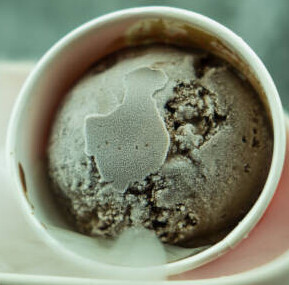
Freezer burn happens when moisture leaves frozen food and the exposed surface becomes dry. On homemade ice cream, it may appear as pale, dry, frosty, or rough patches on the surface.
Freezer burn does not automatically mean the ice cream is unsafe. It mainly affects quality, so the damaged area may taste dry or stale. If the ice cream has an unusual odor, signs of spoilage, or has been stored under unsafe conditions, discard it rather than trying to save it.
Poor sealing is a common reason for freezer burn. A loose lid, too much empty space, or frequent opening can expose the surface to dry freezer air.
Good Homemade Ice Cream Storage & Texture Problems prevention starts with limiting air exposure. Use an airtight container, keep the surface covered when practical, and avoid storing the container for long periods with a poor seal.

- ✦ Use a tight lid
A good seal reduces contact between the ice cream and dry freezer air.
- ✦ Protect the surface
A suitable food-safe surface covering can add another barrier when used correctly.
- ✦ Avoid repeated opening
Every opening exposes the container to warmer air and can increase temperature changes.
- ✦ Keep strong odors away
Store ice cream in a sealed container and away from foods with strong smells.
Can You Eat Homemade Ice Cream With Freezer Burn?
Freezer burn mainly causes a quality problem, not a unique type of food poisoning. A small affected area can often be removed if the ice cream has otherwise been stored properly and shows no signs of spoilage.
The texture and flavor may still be poor in the affected area. When in doubt about storage history or food safety, it is safer to discard the product.
- ✦ Quality check
Look for dry, pale, frosty patches and changes in texture.
- ✦ Safety check
Consider the full storage history, temperature control, smell, appearance, and signs of spoilage.
Why Homemade Ice Cream Gets Soft, Sticky, or Melts Too Fast
Not every texture problem is caused by the freezer. If homemade ice cream stays unusually soft or melts very quickly, the recipe may contain a high level of sugar, alcohol, or other ingredients that lower the freezing point.
Mix-ins can also change texture. Alcoholic extracts or larger amounts of spirits can make a frozen dessert softer because alcohol freezes at a much lower temperature than water. Fruit, syrups, and sauces can add extra water or sugar as well.
A soft texture can also happen when the freezer is not cold enough or when the container is placed in a warm area. Check the freezer conditions before changing the recipe.
When troubleshooting Homemade Ice Cream Storage & Texture Problems, change one factor at a time. That makes it much easier to learn whether the issue came from storage, ingredients, or the freezing process.
- ✦ High sugar
More dissolved sugar lowers the freezing point and can produce a softer texture.
- ✦ Alcohol
Alcohol can strongly lower the freezing point, so recipes with larger amounts may remain soft.
- ✦ Wet mix-ins
Fruit, sauces, and syrups can add water or sugar and change the final texture.
- ✦ Freezer temperature
A freezer that is too warm may not keep homemade ice cream firm enough.
How Mix-Ins Affect Ice Cream Texture
Mix-ins are best added with texture in mind. Large pieces can freeze very hard, while watery ingredients can form ice crystals inside the ice cream.
Chill mix-ins before adding them when the recipe allows. This helps reduce warming during the final stages of churning and can help maintain a smooth texture.
- ✦ Chill fruit and sauces
Cold mix-ins reduce the amount of heat added to the freshly churned ice cream.
- ✦ Control watery ingredients
Reduce excess free water or use preparation methods that concentrate flavor without adding too much water.
Why Refrozen Homemade Ice Cream Often Tastes Different
Refrozen ice cream often has a different texture because the first thaw changes the structure of the frozen dessert. As it warms, some ice melts. When it freezes again, the water can form larger crystals than it had before.
This can make the second-frozen batch feel icy, coarse, or less creamy. The more often the ice cream cycles between soft and frozen states, the greater the chance of noticeable texture damage.
The best approach is to limit temperature swings. Serve what you need, close the container quickly, and return it to the coldest stable part of the freezer.
If a batch has already been badly thawed and refrozen, there is usually no simple storage trick that can fully restore its original texture. The better solution is to prevent the cycle in future batches.
- ✦ Avoid full-container thawing
Do not leave the entire container out while everyone serves themselves.
- ✦ Return it quickly
Put the container back into the freezer as soon as serving is finished.
- ✦ Use smaller containers
Dividing a large batch into practical portions can reduce repeated warming of the full batch.
- ✦ Do not rely on repeated softening
Repeated thawing and refreezing can make texture progressively worse.
Can You Refreeze Homemade Ice Cream?
Refreezing can change texture even when the ice cream remains usable. The main concern is the temperature history and how long the product stayed warm, not simply the act of freezing it a second time.
If homemade ice cream has been left out long enough to raise food-safety concerns, do not depend on refreezing to make it safe. Follow basic food-safety practices and discard food when its storage history is uncertain.
- ✦ Texture concern
Refreezing often creates larger ice crystals and a rougher mouthfeel.
- ✦ Safety concern
Refreezing does not undo unsafe temperature exposure or make spoiled food safe.
A Practical Troubleshooting Guide for Homemade Ice Cream
The fastest way to solve Homemade Ice Cream Storage & Texture Problems is to identify when the problem first appeared. Texture that was wrong immediately after churning points toward the recipe or process. Texture that became poor after several days points more strongly toward storage and temperature changes.
Keep notes when testing a recipe. Record the ingredients, chilling time, churning result, freezer location, container type, and texture after one day and several days. This turns trial and error into a simple process.
Avoid changing several ingredients at once. If you change the sugar, cream, milk, stabilizer, and freezing method together, you will not know which change helped.
Small adjustments can produce major differences in frozen desserts. Once you identify the main cause, repeat the same storage method with the next batch and compare the result.
- ✦ Icy from day one
Check the recipe balance, base temperature, churning process, and freezing speed.
- ✦ Icy after several days
Check freezer temperature, storage location, container seal, and repeated thawing.
- ✦ Hard as a rock
Check the recipe’s sugar and solids balance, then allow a small serving to soften before scooping.
- ✦ Sandy or gritty
Look for sugar crystallization, dairy-solids issues, acidic ingredients, or preparation problems.
- ✦ Dry or frosty surface
Check for freezer burn caused by air exposure, poor sealing, or long storage.
- ✦ Too soft
Check freezer temperature and review sugar, alcohol, and watery mix-ins in the recipe.
- ✦ Texture changes after refreezing
Reduce thawing time and avoid repeated temperature cycles.
A Simple Storage Checklist
A simple routine can prevent many problems. Finish churning, transfer the ice cream promptly, protect the surface, seal the container, and place it in a stable freezer area.
Before serving, take out only the amount you plan to eat. Keep the main container closed and return it to the freezer quickly. This routine is easy to follow and helps protect both texture and flavor.
- ✦ Step 1
Use a clean, freezer-safe container.
- ✦ Step 2
Transfer the freshly churned ice cream promptly.
- ✦ Step 3
Smooth and protect the surface when practical.
- ✦ Step 4
Close the lid tightly.
- ✦ Step 5
Store the container in a stable part of the freezer.
- ✦ Step 6
Limit the time the full container spends outside the freezer.