Microwave Cleaning & Descaling: Easy Ways to Remove Grease, Stains, Odors, and Limescale
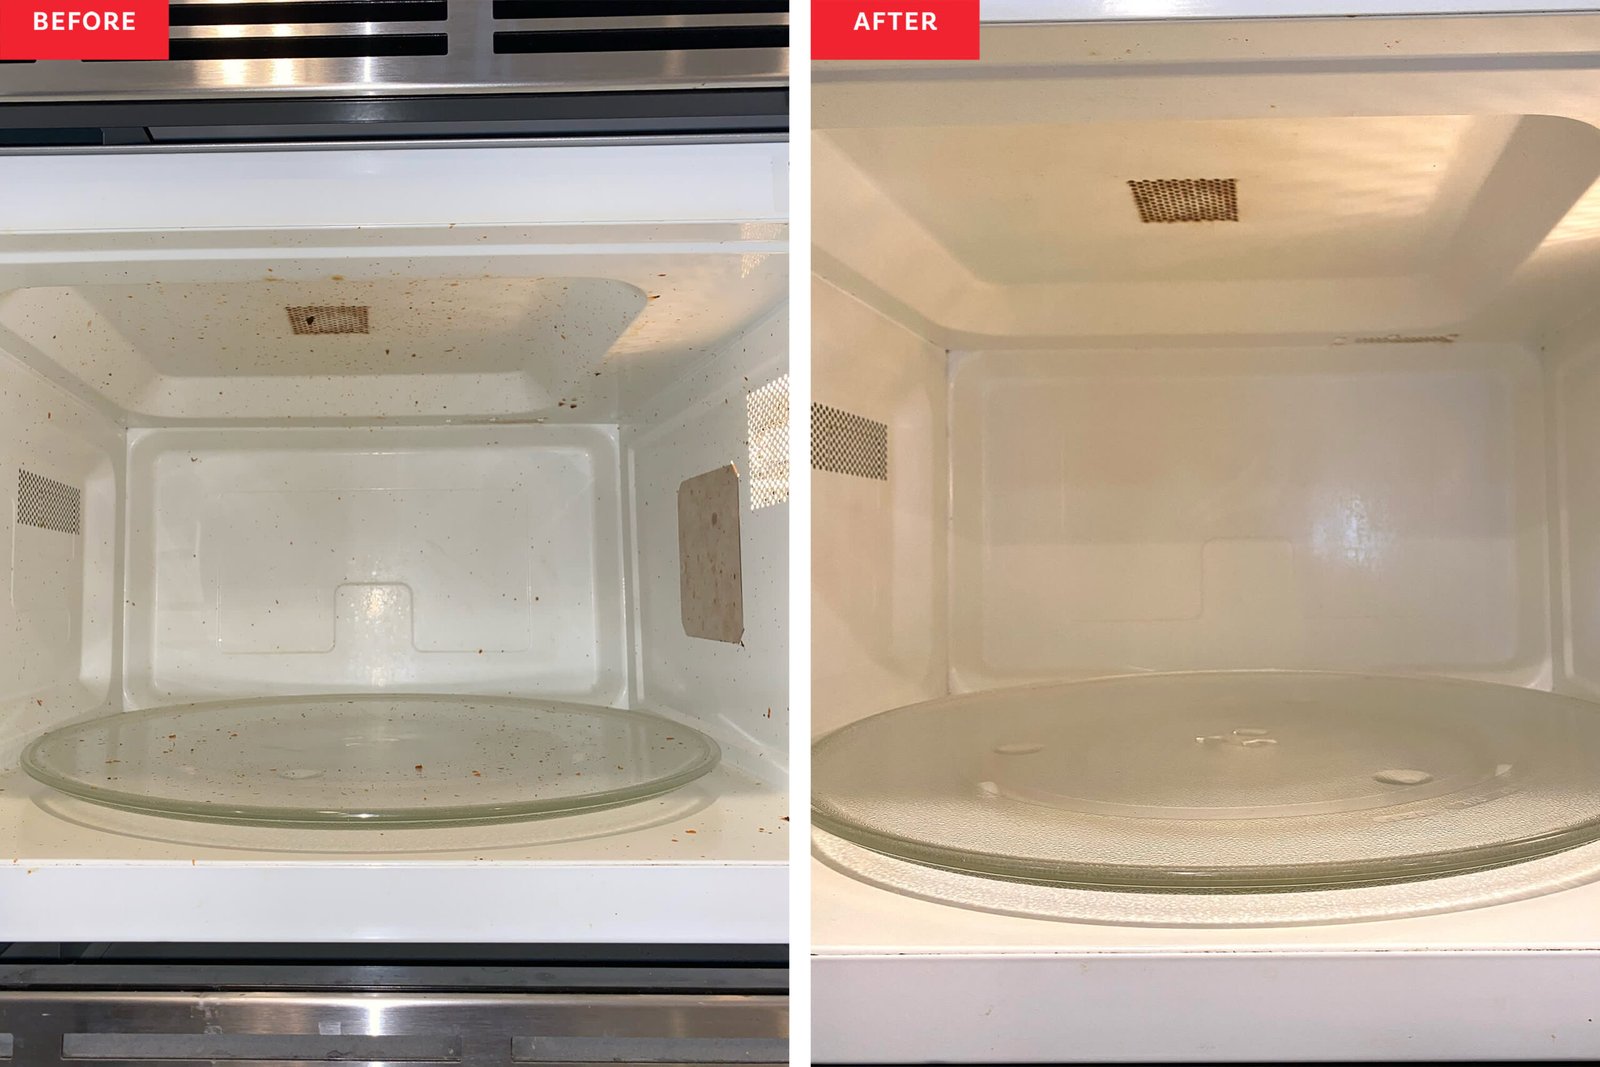
Microwaves can look clean at first glance, yet food splashes can build up fast. Tomato sauce, soup, oil, and dried food can stick to the walls and ceiling. A quick cleaning after spills makes later cleaning much easier.
Good Microwave Cleaning & Descaling does not need harsh chemicals or hard scrubbing. In most homes, warm water, steam, a soft cloth, and a mild cleaner are enough. The key is to soften the mess first and keep moisture away from electrical parts.
I have found that the best microwave cleaning routine is simple: loosen the dirt with steam, wipe from top to bottom, wash removable parts, and dry every surface well. This approach also helps control smells and keeps old food from burning onto the cavity during later use.

Why Regular Microwave Cleaning Matters
Food left inside a microwave can dry into a hard layer. Grease can also collect on the ceiling, side walls, turntable, and door. Each new heating cycle can make these spots harder to remove.
Regular Microwave Cleaning & Descaling helps keep the cooking space fresh and easy to inspect. It can also reduce strong food odors and prevent old splashes from smoking or burning when the oven gets hot.
A clean microwave is also easier to use safely. You can see the door seal, cavity, turntable, and vents more clearly. This makes it easier to spot damage or unusual buildup before it becomes a larger problem.
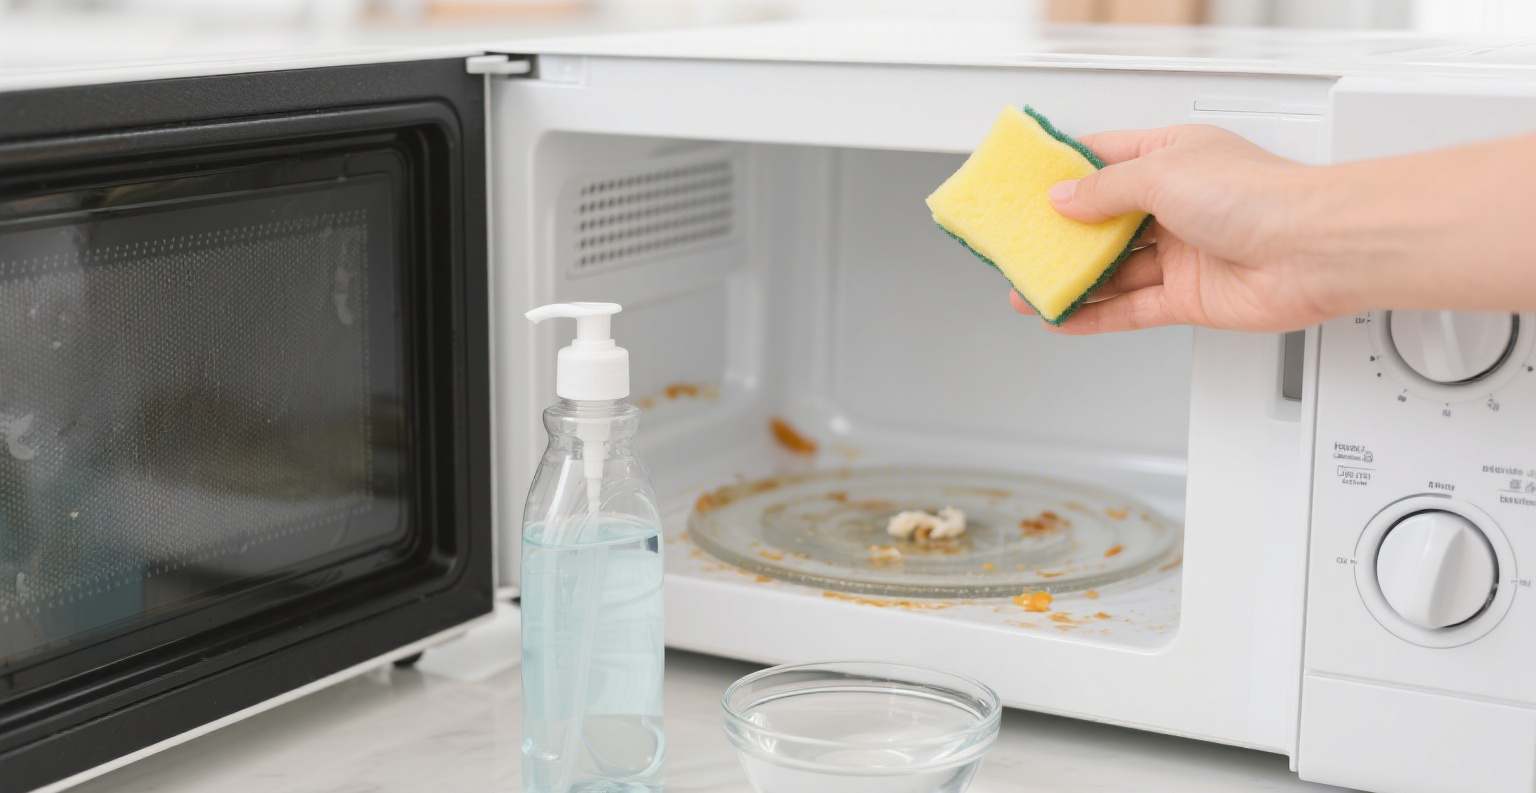
- ✦ Dried food
Food splashes can harden after repeated heating. Steam helps soften them before wiping.
- ✦ Grease
Fat can form a sticky film on the walls and ceiling. Mild dish soap works well on many greasy areas.
- ✦ Odors
Old food residue can hold strong smells. Cleaning the cavity, tray, and door helps remove the source.
- ✦ Mineral deposits
Hard-water minerals may leave white or cloudy marks on some surfaces or accessories. A suitable descaling method can help remove these deposits.
How Often Should You Clean a Microwave?
Wipe fresh spills as soon as the microwave is cool enough to handle. For normal home use, a deeper clean about once a week is a good habit. Busy homes may need more frequent cleaning, especially when the microwave heats sauces, soups, or oily foods.
Do not wait for a thick layer of grime. Small cleaning jobs take only a few minutes, while old baked-on food can take much longer.
- ✦ After spills
Wipe them up once the microwave is safe to touch.
- ✦ Weekly
Clean the cavity, turntable, door, and high-touch areas.
- ✦ As needed
Deal with odors, heavy grease, stains, or mineral buildup when you notice them.
How to Clean a Microwave With Steam
Steam is often the easiest first step in Microwave Cleaning & Descaling. It adds moisture to dried food and makes the grime softer. This means you can wipe more and scrub less.
Place a microwave-safe bowl with water inside the cavity. You can use plain water or add a small amount of vinegar if the appliance manual allows it. Heat the water until plenty of steam forms, then let it sit for a few minutes with the door closed.
Open the door carefully because the bowl and steam may be hot. Remove the bowl with oven mitts if needed. Then wipe the ceiling, walls, back, floor, and inside of the door with a clean soft cloth.
\:max\_bytes(150000)\:strip\_icc()/baking-soda-in-the-microwave-1900607-04-E-57505de715f549c1ad3737238ac61003.jpg "Using baking soda while cleaning a microwave")
- ✦ Use a microwave-safe bowl
Choose a bowl made for microwave use. Do not use metal or containers that are not rated for microwave heating.
- ✦ Do not seal the bowl
Steam needs room to escape. Never heat a sealed container of water.
- ✦ Let the steam work
A short rest after heating gives moisture time to soften stuck food.
- ✦ Wipe from top to bottom
Cleaning high areas first lets loosened dirt fall onto areas you have not cleaned yet.
Step-by-Step Steam Cleaning
Start by removing the turntable and roller ring if your model has one. Wash them with warm water and mild dish soap, then rinse and dry them. Next, wipe loose crumbs from the microwave cavity.
Add water to a microwave-safe bowl and heat it until steam fills the cavity. Turn the microwave off and leave the door closed for a few minutes. Carefully remove the bowl, then wipe the softened residue with a soft cloth.
For stubborn spots, repeat the steam step instead of using force. A second short steam cycle is often safer for the surface than aggressive scraping.
- ✦ First
Remove loose crumbs and removable parts.
- ✦ Second
Heat water in a microwave-safe bowl to create steam.
- ✦ Third
Let the steam soften the residue.
- ✦ Fourth
Wipe the cavity with a soft, damp cloth.
- ✦ Fifth
Dry the surfaces and replace the clean parts.
How to Use Vinegar, Baking Soda, and Dish Soap
Different cleaners work best for different types of dirt. Vinegar can help with some food odors and mineral deposits. Baking soda can help lift grime and reduce odors, while mild dish soap is useful for grease.
For Microwave Cleaning & Descaling, always use the mildest method that solves the problem. Do not mix household cleaning chemicals together. In particular, never mix bleach with vinegar or other acidic cleaners.
If you use a commercial microwave cleaner, follow its label and your microwave manufacturer’s care instructions. Some products may not suit certain surfaces, coatings, or finishes.

- ✦ Vinegar solution
A diluted vinegar solution can help with odors and some mineral residue. Use it on suitable surfaces and follow the appliance manual.
- ✦ Baking soda
Mix baking soda with a little water to make a mild paste for suitable stubborn marks. Apply gently and avoid abrasive scrubbing.
- ✦ Dish soap
A small amount of mild dish soap in warm water works well for grease on removable parts and many washable surfaces.
- ✦ Plain water
For light dirt, warm water and a soft cloth may be all you need.
Cleaning With Vinegar
Vinegar is acidic, so it can help break down some mineral deposits. It can also help with some food smells. Use a diluted solution rather than pouring vinegar directly onto the appliance.
Never spray liquid into vents, openings, controls, or electrical areas. Put the cleaner on a cloth when possible, then wipe the surface.
- ✦ Dilute it
Use water with vinegar rather than relying on concentrated vinegar for routine cleaning.
- ✦ Use a cloth
Apply liquid to the cloth instead of spraying directly into the microwave.
- ✦ Rinse when needed
Wipe with clean water afterward if the surface or manufacturer instructions call for it.
Cleaning With Baking Soda
Baking soda is useful when a mild abrasive action is needed. Mix it with a small amount of water and use a soft cloth or sponge. Keep the pressure light so you do not damage the finish.
Baking soda can also help with lingering food smells. After cleaning, wipe away all residue and dry the cavity before using the microwave again.
- ✦ Make a soft paste
Add only enough water to create a spreadable paste.
- ✦ Rub gently
Use light pressure and avoid rough scouring pads.
Microwave Descaling: Removing Mineral Buildup
Descaling is different from normal grease cleaning. Scale is a mineral deposit that can form when water dries on a surface. It may look white, cloudy, chalky, or crusty.
Microwave Cleaning & Descaling is most useful when mineral residue is present on a suitable surface or removable accessory. The exact need depends on the microwave type, how it is used, and the water in your home.
Some countertop microwaves have simple interiors and no water system, so they may rarely need true descaling. Combination microwave ovens, steam functions, or models with special water systems may have different care rules. Always check the owner’s manual before using a descaler.
- ✦ Identify the buildup
Mineral scale often looks pale and crusty. Grease usually feels oily or sticky and may look yellow or brown.
- ✦ Check the manual
The manufacturer may specify a particular descaling product or method.
- ✦ Use a suitable descaler
Only use a product that the manufacturer allows for the appliance and its specific part.
- ✦ Rinse well
If the instructions require rinsing, remove all cleaner residue before using the appliance.
Vinegar for Light Mineral Deposits
For some removable, non-electrical parts, diluted vinegar may help loosen light mineral residue. It is not a universal descaler, and it should not be used on every microwave surface.
Do not assume that a common kitchen remedy is safe for every model. Coatings, seals, metals, and special water systems can have different care needs. The owner’s manual should guide the final choice.
- ✦ Light scale
A mild acidic solution may loosen some small mineral deposits on compatible parts.
- ✦ Heavy scale
A manufacturer-approved descaler may work better than a household remedy.
- ✦ Unknown surface
Do not use an acidic cleaner until you know that the surface can handle it.
How to Clean the Microwave Door, Turntable, and Exterior
The microwave cavity is only one part of the appliance. The door, handle, control panel, turntable, roller ring, and outside vents also collect dirt. Cleaning these areas helps keep the whole appliance fresh.
Wash the glass turntable with warm water and mild dish soap if the manufacturer allows it. Let it cool before washing if it has just been used, because a sudden temperature change can damage hot glass.
For the exterior, place a small amount of mild cleaner on a cloth rather than spraying around the controls or vents. Wipe the handle and door carefully, then dry the surface with a clean cloth.
\:max\_bytes(150000)\:strip\_icc()/clean-microwave-2000-44664e3a662d4b33b0abdecfc3582df7.jpeg "Cleaning the inside and outside of a microwave")
- ✦ Turntable
Remove it carefully and wash it with warm water and mild dish soap when the manual permits.
- ✦ Roller ring
Clean food particles and grease from the ring so the tray can turn smoothly.
- ✦ Door glass
Wipe both sides with a soft damp cloth and mild cleaner suitable for the surface.
- ✦ Control panel
Use a lightly damp cloth. Keep liquid out of buttons, seams, vents, and openings.
- ✦ Exterior
Wipe fingerprints, grease, and dust with a soft cloth and a suitable mild cleaner.
Cleaning the Door Seal and Edges
The door area needs gentle care. Food can collect around the edges and make the door look dirty. Wipe these areas with a soft damp cloth and remove residue without pulling, cutting, or damaging the seal.
Do not use sharp tools to scrape the door seal or glass. If the door, seal, glass, or latch looks damaged, stop using the appliance and follow the manufacturer’s service guidance.
- ✦ Use gentle pressure
The door and seal should not need hard scrubbing.
- ✦ Avoid sharp tools
Knives and metal scrapers can scratch surfaces or damage seals.
- ✦ Inspect after cleaning
Look for cracks, loose parts, damaged seals, or other signs that need attention.
Microwave Cleaning Mistakes to Avoid
Most microwave cleaning problems come from using too much water, too much force, or the wrong cleaner. The goal is to remove dirt without letting liquid reach electrical parts or damaging the cavity.
Avoid abrasive pads, metal tools, and harsh chemicals unless the manufacturer specifically approves them. A scratched or damaged interior may be harder to clean and can affect the appliance’s condition.
Microwave Cleaning & Descaling should also never involve running the appliance empty. If you use steam, there must be a suitable amount of water in a microwave-safe container, and you should follow the appliance instructions.
- ✦ Do not spray into vents
Liquid can reach electrical components. Apply cleaner to a cloth instead.
- ✦ Do not use metal scrubbers
Metal tools can scratch surfaces and should not be used as a routine cleaning method.
- ✦ Do not mix cleaners
Mixing household cleaners can create harmful fumes or unwanted chemical reactions.
- ✦ Do not soak the microwave
The cavity should be damp cleaned, not flooded with water.
- ✦ Do not use a damaged appliance
Damage to the door, seal, glass, or cavity needs proper inspection and manufacturer guidance.
- ✦ Do not scrape baked-on food with sharp tools
Steam and repeated gentle cleaning are safer than aggressive scraping.
When You Should Stop Cleaning and Seek Service
Cleaning cannot fix every microwave problem. Stop using the appliance if you see damaged door glass, a damaged seal, severe cavity damage, exposed wiring, or other electrical problems.
If the microwave sparks during normal use, makes unusual sounds, smells strongly of burning, or behaves differently after cleaning, do not keep testing it. Follow the manufacturer’s safety and service instructions.
- ✦ Damaged door
A damaged door or glass needs proper attention before continued use.
- ✦ Damaged seal
A torn or badly damaged seal should be checked according to the manufacturer’s guidance.
- ✦ Burning smell
A persistent burning smell can point to a problem beyond normal food residue.
- ✦ Sparking
Sparking should not be ignored, especially when it continues after obvious food or metal causes have been ruled out.