Blender Troubleshooting & Leak Prevention: Common Problems, Fixes, and Maintenance Tips
A leaking blender can turn a quick breakfast into a messy cleanup. Liquid may drip from the bottom of the jar, seep around the blade base, or escape from the lid. In many cases, the cause is simple and can be found with a careful check.
Good Blender Troubleshooting & Leak Prevention starts with one rule: never test a leaking blender while it is plugged in. Unplug it first, dry the base, and inspect the jar, blade unit, gasket, lid, and locking parts. This simple habit reduces the risk of electrical damage and cuts.
Over time, seals can lose their shape. Food can also collect around the gasket or blade housing. From my experience with common kitchen appliance problems, small parts often cause bigger symptoms, so replacing the whole blender is not always the first step.

Why Is My Blender Leaking?
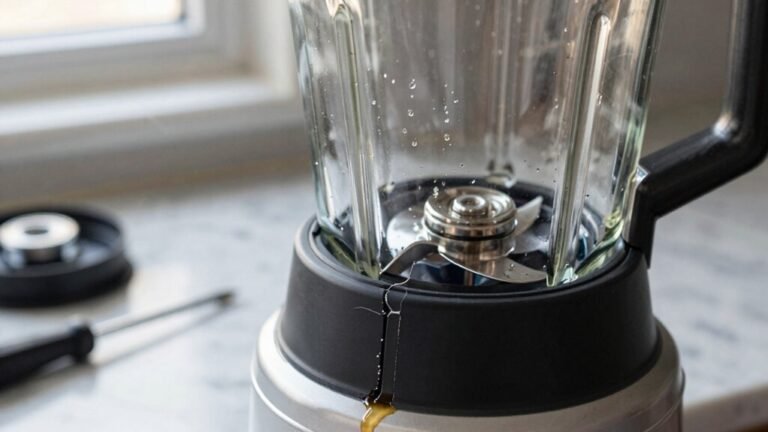
A blender can leak from several points. The most common areas are the bottom of the jar, around the blade assembly, near the lid, or where the jar meets the motor base. Finding the exact point matters because each problem needs a different fix.
A small leak does not always mean the motor has failed. A dirty gasket, loose blade base, cracked jar, or damaged seal can allow liquid to escape. Blender Troubleshooting & Leak Prevention is easier when you first identify where the liquid starts.

- ✦ Worn gasket
A gasket creates the seal between parts. If it is cracked, flattened, stretched, or hard, it may no longer stop liquid.
- ✦ Loose blade assembly
A loose blade unit can leave a small gap that lets liquid pass through the bottom of the jar.
- ✦ Food or residue
Dried food around the seal can prevent the gasket from sitting flat.
- ✦ Cracked jar
A crack in the jar or blade housing can cause a leak that cleaning or tightening will not fix.
- ✦ Overfilled jar
Too much liquid can reach the lid or move through openings during blending, especially at high speed.
Where to Look for the Leak
Start with the outside of the jar. Look under the jar, around the blade base, along the lid edge, and near the handle. Wipe the outside dry, then check for fresh moisture after the blender remains unplugged.
Do not place your hands near moving blades. If the source is hard to see, remove the jar from the motor base and inspect it in a well-lit area.
- ✦ Bottom of jar
Check the blade assembly, gasket, threaded area, and any locking ring.
- ✦ Lid
Check the lid seal, cap, vent, and fit around the rim.
- ✦ Jar wall
Look for cracks, chips, cloudy stress marks, or damage near the bottom.
How to Troubleshoot a Blender Leak Safely
Safety should come before testing. Unplug the blender before touching the jar, blade assembly, motor base, or any wet area. Never operate a blender if liquid has entered the motor base.
A good Blender Troubleshooting & Leak Prevention routine uses a simple process. Find the leak, inspect the parts, clean them, assemble them correctly, and test only when the appliance is safe and dry.

- ✦ 1. Unplug the blender
Disconnect power before inspection or cleaning. This protects you from accidental blade movement and electrical hazards.
- ✦ 2. Empty the jar
Remove the contents and rinse the jar so food does not hide the source of the leak.
- ✦ 3. Inspect the seal
Look for cracks, flattening, cuts, hard spots, or signs that the gasket has moved out of position.
- ✦ 4. Check the blade base
Inspect the blade assembly and locking parts for damage or looseness. Follow the manufacturer’s instructions for removal and tightening.
- ✦ 5. Check the jar
Look closely for cracks or chips. Do not use a damaged jar with hot or cold liquid.
Clean Before You Replace Anything
A dirty seal can look like a failed seal. Remove food residue from the gasket area and mating surfaces with a soft cloth or brush. Use the cleaning method listed in the blender manual, since some parts are not dishwasher safe.
After cleaning, let parts dry fully. Then place the gasket back in its correct position. If the seal still looks damaged or does not sit flat, replacement is usually safer than trying to repair it.
- ✦ Do not glue a gasket
Adhesives can fail when exposed to food, heat, water, and repeated movement. Use a compatible replacement part instead.
- ✦ Do not force threads
Cross-threading a blade assembly or locking ring can damage the parts and create a poor seal.
How to Fix a Blender Leaking From the Bottom
A leak from the bottom of the jar often points to the gasket, blade assembly, jar threads, or a damaged seal. The exact design varies by blender, so use the manufacturer’s instructions when taking apart any removable blade unit.
For Blender Troubleshooting & Leak Prevention, start with the least invasive fix. Clean the mating surfaces and check that the gasket sits evenly. If the gasket is worn, replace it with the correct part for that model.

- ✦ Clean the sealing area
Remove food and dried liquid from the gasket, jar base, threads, and blade housing.
- ✦ Inspect the gasket
Replace a gasket that is cracked, torn, stretched, brittle, or permanently flattened.
- ✦ Check the blade assembly
Make sure the assembly is installed as the manufacturer specifies and that no part is cracked or damaged.
- ✦ Inspect the jar threads
Damaged or cross-threaded connections may stop the parts from sealing correctly.
- ✦ Replace damaged parts
A cracked jar, damaged blade housing, or failed seal should be replaced with a compatible part.
When a Bottom Leak Means You Should Stop Using the Blender
Stop using the blender if liquid reaches the motor base or electrical controls. Do not keep running it to see whether the leak gets worse. Dry the appliance and follow the manufacturer’s service guidance.
A cracked container or damaged blade housing also calls for replacement. A temporary patch may not hold under vibration and pressure, and it can create a food safety or injury risk.
- ✦ Liquid inside the base
Do not power the appliance. Keep it unplugged and seek the manufacturer’s service instructions.
- ✦ Cracked container
Replace the damaged container rather than relying on glue, tape, or another temporary repair.
- ✦ Damaged blades
Stop use if blades are bent, loose, cracked, or otherwise damaged.
Blender Leaking From the Lid
Not every leak comes from the bottom. If liquid escapes from the top, inspect the lid, lid gasket, center cap, and vent. A lid that looks closed may still have a small gap if food is trapped under the seal.
Blender Troubleshooting & Leak Prevention also means using the correct fill level. Leave the space required by the blender manual, especially when blending foods that expand, foam, or become hot.
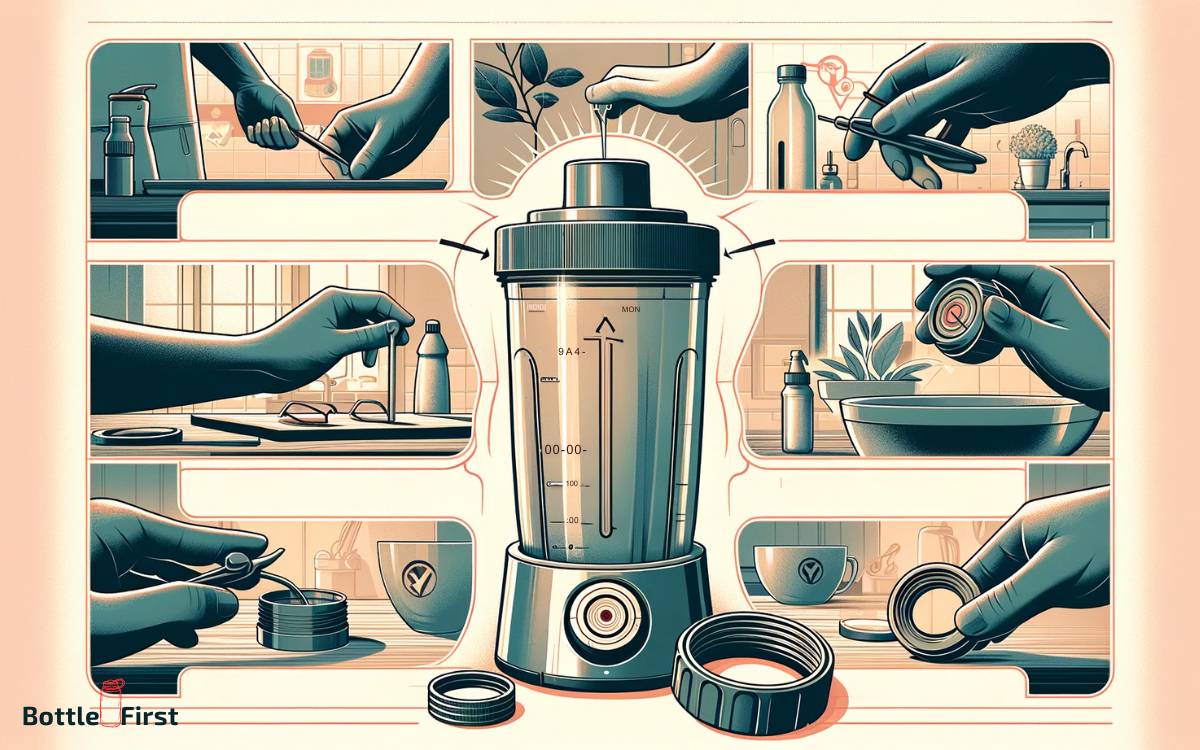
- ✦ Clean the lid rim
Remove food and sticky residue from the lid and jar rim.
- ✦ Check the lid seal
Look for a loose, cracked, stretched, or flattened sealing ring.
- ✦ Secure the lid
Fit the lid fully according to the blender’s design before starting the motor.
- ✦ Avoid overfilling
Too much liquid can reach the lid and escape during blending.
- ✦ Use caution with hot liquids
Only blend hot liquids if the blender is specifically designed for them and the manual permits it.
Why Foam and Pressure Can Cause a Mess
Some foods create foam when blended. Foam takes up more space and can reach the lid even when the liquid level looks safe at first. Carbonated liquids can also create pressure and should not be blended unless the manufacturer specifically allows it.
For safer results, follow the recommended fill line and speed settings. When working with hot food, use a blender designed for hot ingredients and follow its ventilation instructions.
- ✦ Foamy mixtures
Milkshakes, some fruit mixtures, and other foods can expand during blending. Use less volume when needed.
- ✦ Hot mixtures
Steam can build pressure in a closed container. Follow the manual and use a model designed for hot blending.
Other Common Blender Problems and Simple Fixes
Leaks are only one blender problem. A blender may also fail to start, stop during use, smell hot, make unusual sounds, or leave large chunks in the food. Many of these issues have simple causes, but electrical or mechanical faults may need professional service.
A clear troubleshooting process helps you avoid unnecessary repairs. Check the easy and safe items first, then stop if the problem points to damaged wiring, a burning smell, broken parts, or liquid inside the motor base.
- ✦ Blender will not start
Check that the power cord is connected, the outlet works, and the jar or lid is correctly locked if the model has a safety interlock.
- ✦ Blender stops during use
The motor may have overheated or the load may be too heavy. Turn it off and let it cool before following the manual’s troubleshooting steps.
- ✦ Blender makes a grinding sound
A damaged blade, hard object, worn bearing, or other mechanical issue may cause unusual noise. Stop using the blender and inspect it safely.
- ✦ Food does not blend well
Too little liquid, an overloaded jar, dull blades, or poor ingredient placement can reduce blending performance.
- ✦ Burning smell
Stop the blender and unplug it. A burning smell can point to motor stress or an electrical problem that should not be ignored.
- ✦ Motor gets very hot
Heavy loads and long blending times can create heat. Use the recommended amount and rest the machine as directed by the manufacturer.
What to Do When the Blender Overheats
Turn off and unplug the blender if the motor becomes unusually hot. Give it time to cool before checking the load, airflow, and instructions in the manual.
Do not cover the motor vents while the blender runs. If overheating happens with normal loads and proper use, the machine may need service.
- ✦ Reduce the load
Blend smaller batches when the ingredients are thick or heavy.
- ✦ Use the correct speed
Follow the recommended speed and run time for the ingredients and model.
- ✦ Allow cooling time
Let the motor cool before another cycle when the manual calls for rest periods.
Blender Leak Prevention: Daily and Monthly Care
Prevention is easier than repair. A few minutes of care after use can keep food from drying around seals and threads. It also gives you a chance to spot damage before a leak reaches the motor base.
A practical Blender Troubleshooting & Leak Prevention routine should match how often you use the appliance. A daily smoothie maker may need more frequent checks than a blender used once a month.

- ✦ Clean after use
Rinse and clean the jar, lid, gasket, and removable parts as directed by the manufacturer.
- ✦ Dry the parts
Allow removable parts to dry before storage to reduce trapped moisture and residue.
- ✦ Inspect the gasket
Check for cuts, cracks, hard spots, stretching, or flattening.
- ✦ Check the jar
Look for cracks and chips, especially around the base and threaded areas.
- ✦ Keep the motor base dry
Never immerse the motor base unless the manufacturer specifically states that it is designed for immersion.
- ✦ Use the right parts
Replace seals and other parts with compatible parts made for the specific blender model.
A Simple Leak Prevention Checklist
A short check before blending can prevent many avoidable messes. Make sure the jar, blade assembly, gasket, and lid are clean and correctly fitted.
Before storage, inspect the sealing areas again. If a part looks damaged, replace it before the next use rather than waiting for a leak.
- ✦ Before blending
Check the jar, gasket, blade unit, lid, and locking points.
- ✦ During blending
Stay within the recommended fill level and stop if you notice leaking, unusual noise, or a burning smell.
- ✦ After blending
Clean, rinse, and dry the parts according to the manufacturer’s instructions.
When to Replace a Blender Part or the Whole Blender
Not every blender problem requires a new appliance. A gasket, lid, jar, or blade assembly may be replaceable. The key is to identify whether the damaged part has a safe, compatible replacement.
Blender Troubleshooting & Leak Prevention should not focus only on saving money. Food safety, electrical safety, and blade safety matter more than extending the life of a damaged part.
- ✦ Replace the gasket
Replace it when it is cracked, torn, brittle, stretched, or no longer seals after proper cleaning and fitting.
- ✦ Replace the jar
Replace a jar with cracks, chips, severe scratches, or other structural damage that can affect safe use.
- ✦ Replace the blade assembly
Replace a damaged, bent, loose, or worn blade assembly with a compatible part.
- ✦ Consider replacing the blender
Replacement may make sense when several major parts have failed, compatible parts are unavailable, or repair costs approach the cost of a suitable new model.
Signs a Repair Is Not Enough
A damaged motor base is a different problem from a worn gasket. If liquid has entered the base, wiring looks damaged, or the blender repeatedly overheats during normal use, stop using it and seek qualified service or replacement advice.
The same applies to severe jar or blade damage. Do not trade a small repair cost for a greater risk of injury or electrical damage.
- ✦ Repeated leaks
A leak that returns after correct assembly and a proper seal replacement needs further inspection.
- ✦ Electrical damage
Sparks, damaged cords, liquid inside the base, or electrical smells require the appliance to remain unplugged.
- ✦ Structural damage
Cracked containers and damaged blade housings should not be used.
Best Practices for Safe Blender Use in a U.S. Kitchen
Blenders are common in U.S. kitchens for smoothies, sauces, soups, frozen drinks, and meal prep. Safe use starts with the instructions for the exact model because container design, speed limits, fill lines, and hot-liquid rules vary.
Do not assume that a method that works for one blender works for another. This is especially important for high-speed machines, personal blenders, and models with removable blade assemblies.
- ✦ Read the model manual
Keep the manual available for fill limits, cleaning instructions, replacement parts, and safe operating times.
- ✦ Use suitable ingredients
Avoid hard objects or ingredients that the manufacturer says the blender cannot handle.
- ✦ Keep the base dry
Wipe spills at once and keep liquids away from switches, vents, and electrical connections.
- ✦ Use care with children
Keep young children away from the appliance, sharp blades, and loose parts.
- ✦ Stop at the first warning sign
Leaks, smoke, burning smells, unusual sounds, or damaged parts are reasons to stop and inspect the appliance.
Why the Manufacturer Manual Matters
Blender designs differ more than they may seem. Some have fixed blade assemblies, while others have removable bases and seals. Some containers are approved for hot foods, while others are not.
For accurate Blender Troubleshooting & Leak Prevention, use the model-specific instructions whenever they conflict with general advice. The manual is the best source for compatible parts, cleaning methods, and operating limits.
- ✦ Model-specific parts
Use the correct gasket, jar, lid, blade assembly, or replacement component for your model.
- ✦ Model-specific cleaning
Follow the stated dishwasher, soaking, and cleaning rules to avoid damaging seals or parts.