Microwave Filter Replacement: Quick DIY Guide
Replacing a microwave filter restores proper airflow, cuts odors, and prevents grease buildup fast.
I have worked on kitchen appliances for years and helped homeowners choose and install parts safely. This guide on microwave filter replacement draws on hands-on experience, manufacturer guidance, and practical tips you can use today. Read on to learn what filters do, when to change them, how to do a safe microwave filter replacement, and how to pick the right part for your model.

What is a microwave filter and why it matters
A microwave filter captures grease, smoke, and odors from foods. Many over-the-range microwaves and hood-microwave combos use two main filter types: metal grease filters and charcoal odor filters. The metal filter protects the vent fan and ductwork from oil and solid particles. The charcoal filter traps smells and small gases when your microwave recirculates air instead of venting outside.
Understanding the role of filters helps you see why microwave filter replacement matters. A clogged filter reduces airflow. That raises heat and makes your microwave and hood work harder. Replacing filters keeps the unit safe and efficient and helps your kitchen smell fresher.
:max_bytes(150000):strip_icc()/ar-change-microwave-filter-4x3-a943fd35376d4f5a8fb76e8d643aeb66.jpg)
Signs you need a microwave filter replacement
Know the common signs so you can act before damage occurs.
- Reduced fan suction. If steam or smoke hangs in the kitchen, the filter may be clogged.
- Persistent food odors after cooking. Charcoal filters lose effectiveness over time.
- Visible grease or dark buildup on the metal filter. That means it is saturated and blocking airflow.
- Loud fan noise or strain during use. A blocked filter forces the motor to work harder.
- Error messages or reduced microwave performance in some models. Manufacturers often link airflow issues to performance faults.
You may ask how often to replace a filter. For heavy cooks, plan for microwave filter replacement every 6 months for charcoal and every 3–6 months for metal cleaning. For light users, inspect filters every 6–12 months.

Step-by-step microwave filter replacement (DIY guide)
These steps work for most over-the-range microwaves and recirculating units. If your model is built-in or unusual, check the manual.
Tools and supplies
- Replacement metal filter and/or charcoal filter. Match part numbers or measure the old filter.
- Soft cloth, mild dish soap, warm water for cleaning reusable metal filters.
- Screwdriver if your microwave uses screws to secure the filter.
- Gloves and safety glasses for protection.
Step-by-step replacement
- Turn off power. Unplug the microwave or switch off the circuit breaker. Safety first.
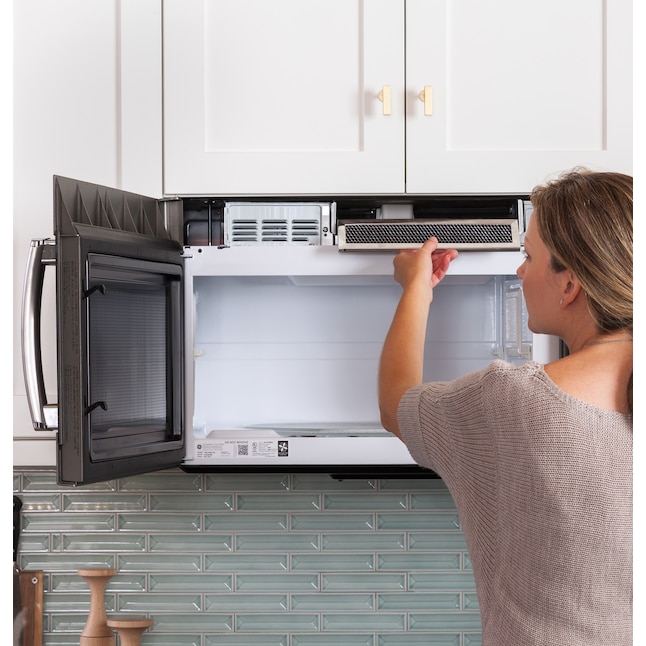
- Locate the filter. Most filters sit under the microwave or behind a small access panel.
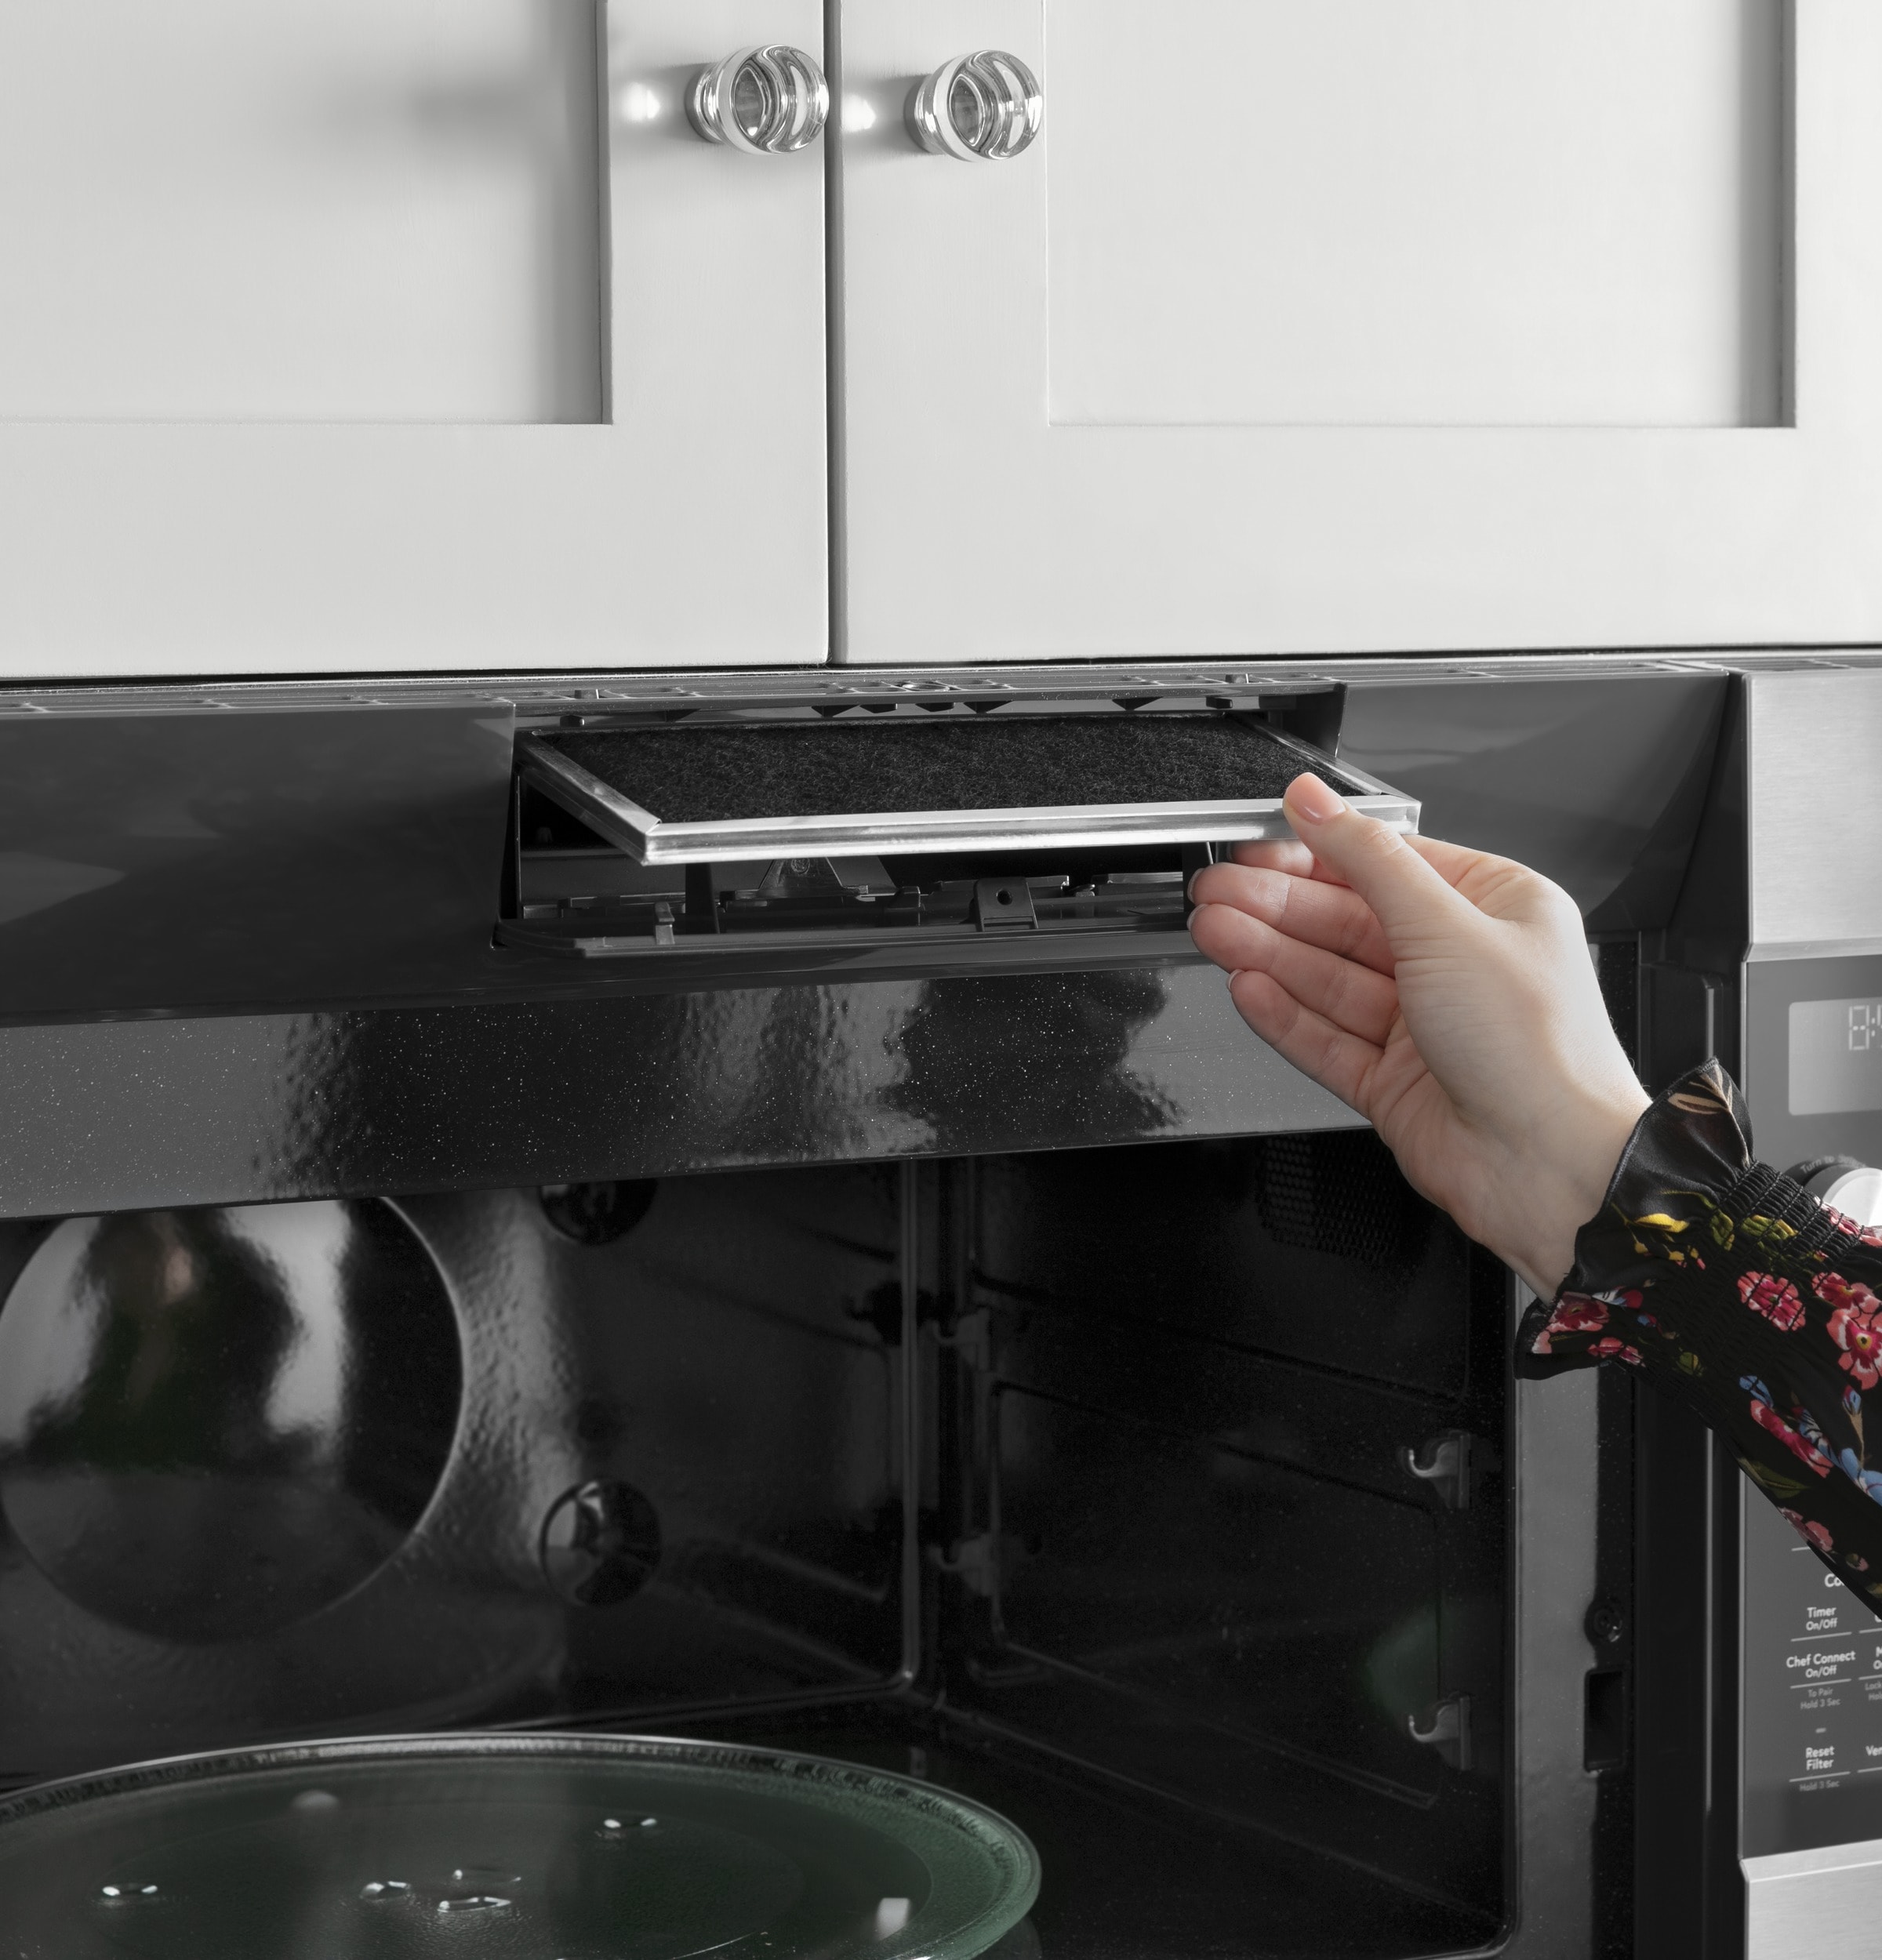
- Remove the old filter. Slide or unclip the metal filter. If screws hold a panel, remove screws first.
- Clean if reusable. Wash metal filters in warm soapy water or run in the top rack of a dishwasher if manufacturer allows.
- Install the new filter. Fit the metal filter into place or insert the charcoal cartridge. Ensure clips or tabs engage fully.
- Test the fan. Restore power and run the exhaust for a minute. Check airflow and listen for unusual sounds.
- Dispose of old charcoal responsibly. Do not throw oil-soaked materials into recycling.
When to call a pro
- If the filter is hard to access and removal risks damage.
- If the microwave has internal damage or electrical issues.
- If the fan or motor shows persistent problems after filter replacement.
My tip: keep a small box of spare charcoal cartridges and a clean metal filter on hand. It saves an urgent run to the store.
Cost, lifespan, and time required
Costs vary by filter type and brand. OEM filters cost more. Aftermarket filters cost less and can be fine if they match size and specs.
- Typical cost for metal grease filters: $10–$30.
- Typical cost for charcoal odor cartridges: $15–$50.
- Labor time for DIY microwave filter replacement: 10–30 minutes.
- Lifespan: Metal filters can be cleaned and reused for months to years. Charcoal filters usually last 6–12 months.
Plan for replacement costs in your appliance budget. If a technician is needed, add labor charges. Always compare the part number and dimensions before you buy to avoid returns.

How to choose the right replacement filter
Choosing the correct filter makes installation easier and performance better.
- Check the model number. Look inside the microwave manual or on the unit label for filter part numbers.
- Measure carefully. Length, width, thickness, and tab positions must match.
- Decide OEM vs aftermarket. OEM gives exact fit. Reputable aftermarket options can save money.
- Confirm type. Use metal filters for grease capture. Use charcoal cartridges for recirculation odor control.
- Read ratings. Some filters list their grease-capture percent or odor reduction claims. Look for clear specs.
I once bought a low-cost filter that did not seat properly. Air leaked and the motor kept running hot. Lesson learned: fit matters as much as price.

Cleaning, maintenance, and proper disposal
Regular care extends filter life and keeps the microwave healthy.
Cleaning metal filters
- Remove and soak in hot, soapy water for 15–30 minutes.
- Use a soft brush to remove grease.
- Rinse and dry fully before reinstalling.
- Many metal filters are dishwasher-safe; check the manual.
Maintaining charcoal filters
- Charcoal filters cannot be cleaned effectively. Replace them as recommended.
- Mark the date of installation to track life.
Disposal tips
- Wrap greasy filters before discarding if required by local rules.
- Charcoal cartridges are safe to throw away, but check local recycling guidelines.
Common problems and troubleshooting after replacement
If odors or poor airflow persist, try these checks.
- Filter not seated correctly. Remove and reinstall. A small misalignment can block air.
- Wrong part installed. Compare part numbers and dimensions to the old filter.
- Fan or duct blockage beyond the filter. Clean the vent path or call a pro.
- Residual odor. Run the fan with windows open and consider a fresh charcoal filter.
If the microwave displays error codes after replacement, consult the manual. Some models require a reset after part changes.

Safety and environmental considerations
Replacing filters is low-risk but safety matters.
- Always cut power before working. Electricity and metal parts can be dangerous.
- Avoid soaking electrical components. Only remove the filter element.
- Do not run the microwave without any filter if manufacturer warns against it. It can push grease into the motor and ducts.
- Recycle where possible. Some metal filters can be recycled as scrap metal. Follow local rules for disposal.
Frequently Asked Questions of microwave filter replacement
How often should I replace my microwave filter?
Replace charcoal odor filters every 6 to 12 months for normal use. Clean metal grease filters every 1 to 3 months and replace only if damaged.
Can I clean and reuse a charcoal filter?
No. Charcoal filters lose adsorption ability and should be replaced, not cleaned.
Is it safe to replace the filter myself?
Yes, most microwave filter replacement tasks are simple and safe if you disconnect power and follow the manual. Call a technician for complicated access or electrical faults.
Will a wrong-size filter harm my microwave?
A wrong-size filter can allow grease into the fan or reduce airflow, causing strain. Use filters that match your model for best results.
How do I find the correct filter part number?
Check the microwave manual, look at the label inside the unit, or measure the old filter and compare with parts listings for your model.
Conclusion
A timely microwave filter replacement keeps your kitchen air cleaner, reduces odors, and protects the appliance. Inspect filters regularly, clean metal ones, and replace charcoal cartridges on schedule. If you follow the simple steps above, you can do a safe and effective replacement in minutes. Take action today: check your filter, order the right part if needed, and enjoy better performance from your microwave. Leave a comment with your model and questions, or subscribe for more appliance tips.