Discs & Attachments: A Complete Guide to Tractor Disc Implements
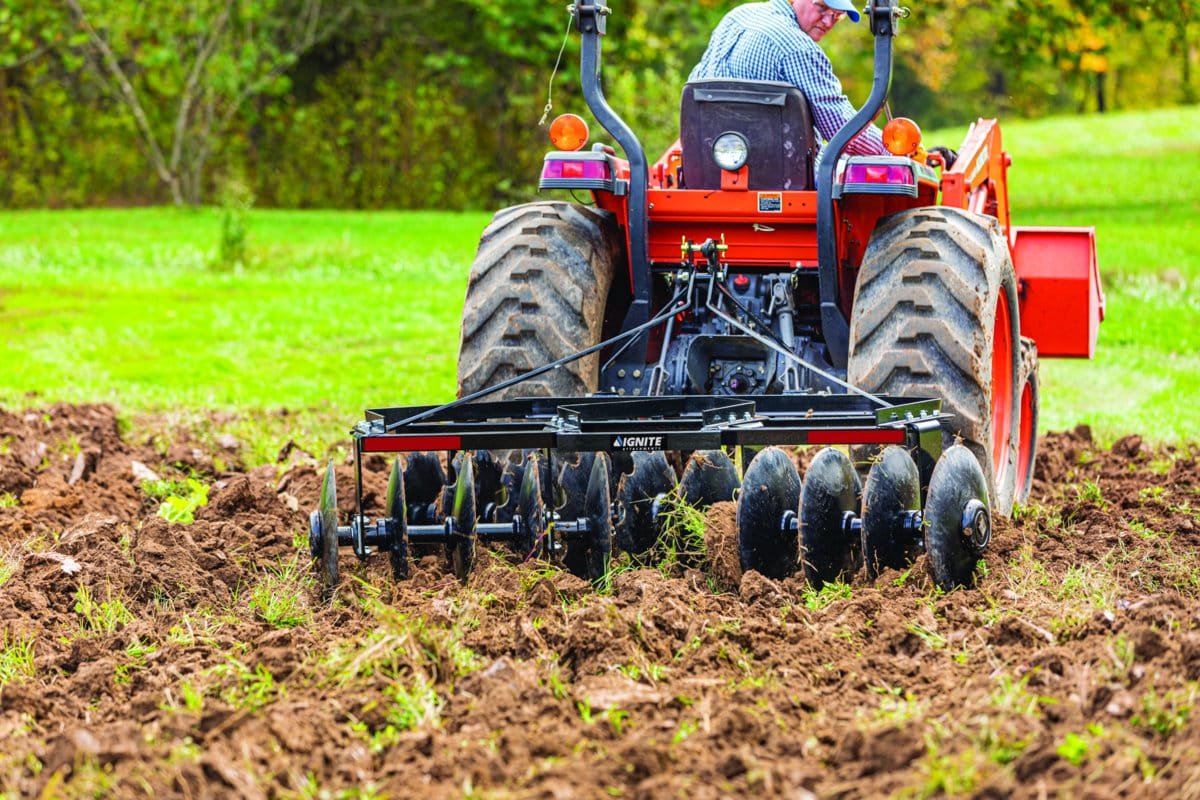
Discs & Attachments can turn a basic tractor into a much more useful farm machine. A well-matched disc harrow can break soil clods, mix crop residue, cut weeds, and leave a better surface for planting. For many U.S. farms, these tools help reduce the number of separate passes across a field.
The key is not to buy the biggest or heaviest attachment you can find. The best choice depends on the tractor, soil, field size, crop system, and the exact task. In practice, a disc that matches the tractor and soil often gives better results than a much larger tool that the tractor cannot pull or control well.
This guide explains the main types of Discs & Attachments, how they work, how to choose one, and how to use them with care. It also covers common mistakes, maintenance, storage, and questions that come up when shopping for tractor disc equipment.
What Are Discs & Attachments?
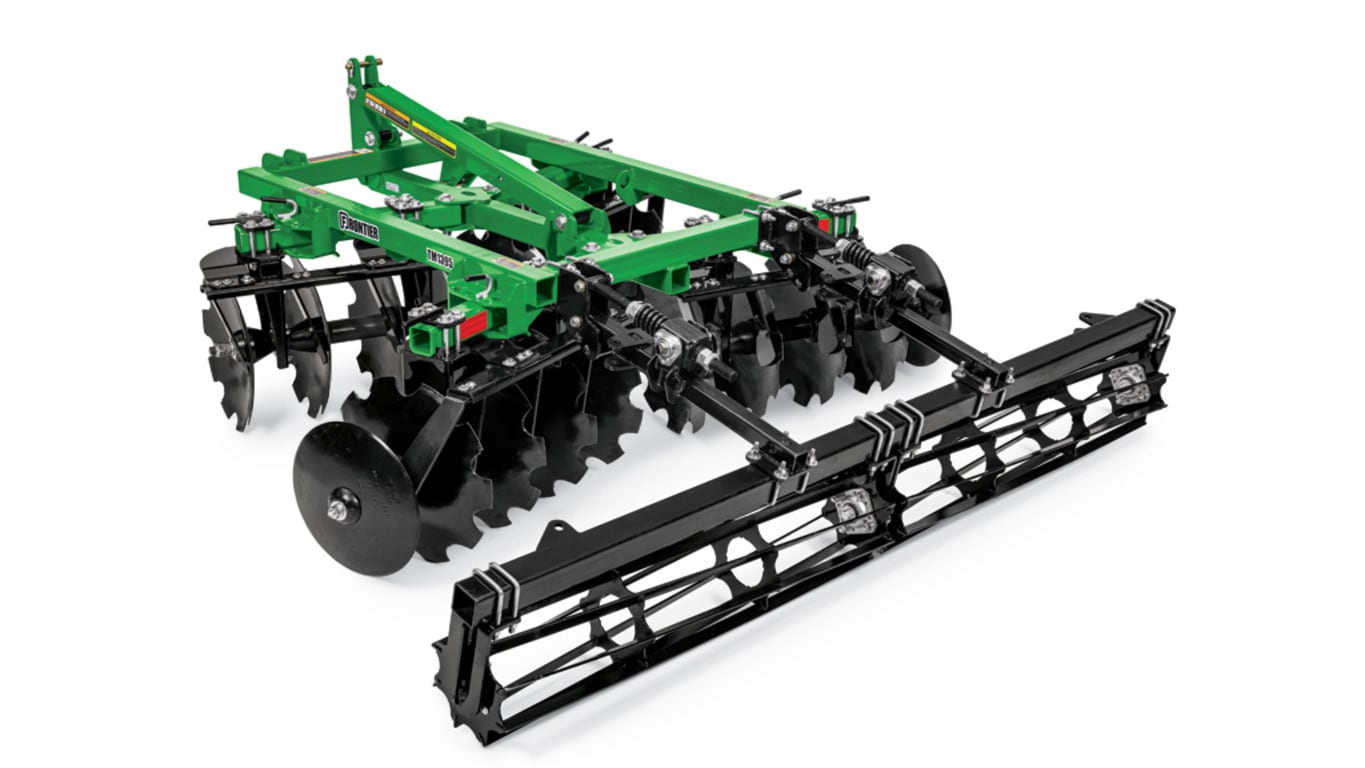
Discs & Attachments are implements that connect to tractors and other machines to perform specific field or land tasks. The term can include disc harrows, disc plows, offset discs, finishing discs, and other tools that use round steel blades. Some models attach to a three-point hitch, while larger units may use a drawbar or another connection system.
A disc blade is usually round and slightly curved. The curve helps the blade enter the soil and move soil as the tractor pulls the implement. Some blades have smooth edges, while others have notched edges. Notched blades can help cut through residue and tough plant material.
The basic idea is simple. The tractor supplies the pulling force, and the disc blades do the soil work. The frame, gangs, bearings, scrapers, hitch, and weight all affect how well the tool works.
- ✦ Disc harrow
A disc harrow uses groups of concave blades to cut and mix soil. It is common for seedbed preparation, residue mixing, and weed control.
- ✦ Disc plow
A disc plow uses large, heavy blades to cut and turn tougher soil. It can suit heavier primary tillage work.
- ✦ Offset disc
An offset disc places blade gangs in an offset layout. This design can provide strong cutting action and work well in some heavy or uneven field conditions.
- ✦ Finishing disc
A finishing disc is built for more refined soil work. It can help create a smoother seedbed after heavier tillage.
How Disc Blades Work
As the tractor moves forward, the blades roll and cut into the soil. Their shape moves soil sideways and upward, which breaks clods and mixes material. Blade angle, soil moisture, travel speed, and working depth all change the result.
A disc should not simply be forced deep into dry or hard ground. The tractor must have enough power and traction to pull it at the selected depth. Too much depth can increase fuel use, wheel slip, and stress on the tractor and implement.
- ✦ Blade diameter
Larger blades can provide more clearance and cutting depth, while smaller blades often suit lighter work and more compact equipment.
- ✦ Blade spacing
Closer spacing can produce a more even soil finish, while wider spacing can allow more residue and soil to move through the frame.
- ✦ Blade edge
Smooth blades suit many general tillage jobs. Notched blades can provide extra bite when cutting residue or firm soil.
Types of Discs & Attachments for Tractors
Not all Discs & Attachments perform the same job. A small property owner may need a compact three-point disc for garden plots, food plots, or pasture renovation. A row-crop farmer may need a much wider machine designed for long field passes and higher tractor power.
Understanding the main types makes equipment shopping much easier. Start with the job, then look at the soil, tractor, and required working width. This avoids buying an attachment that looks useful but does not fit the work.
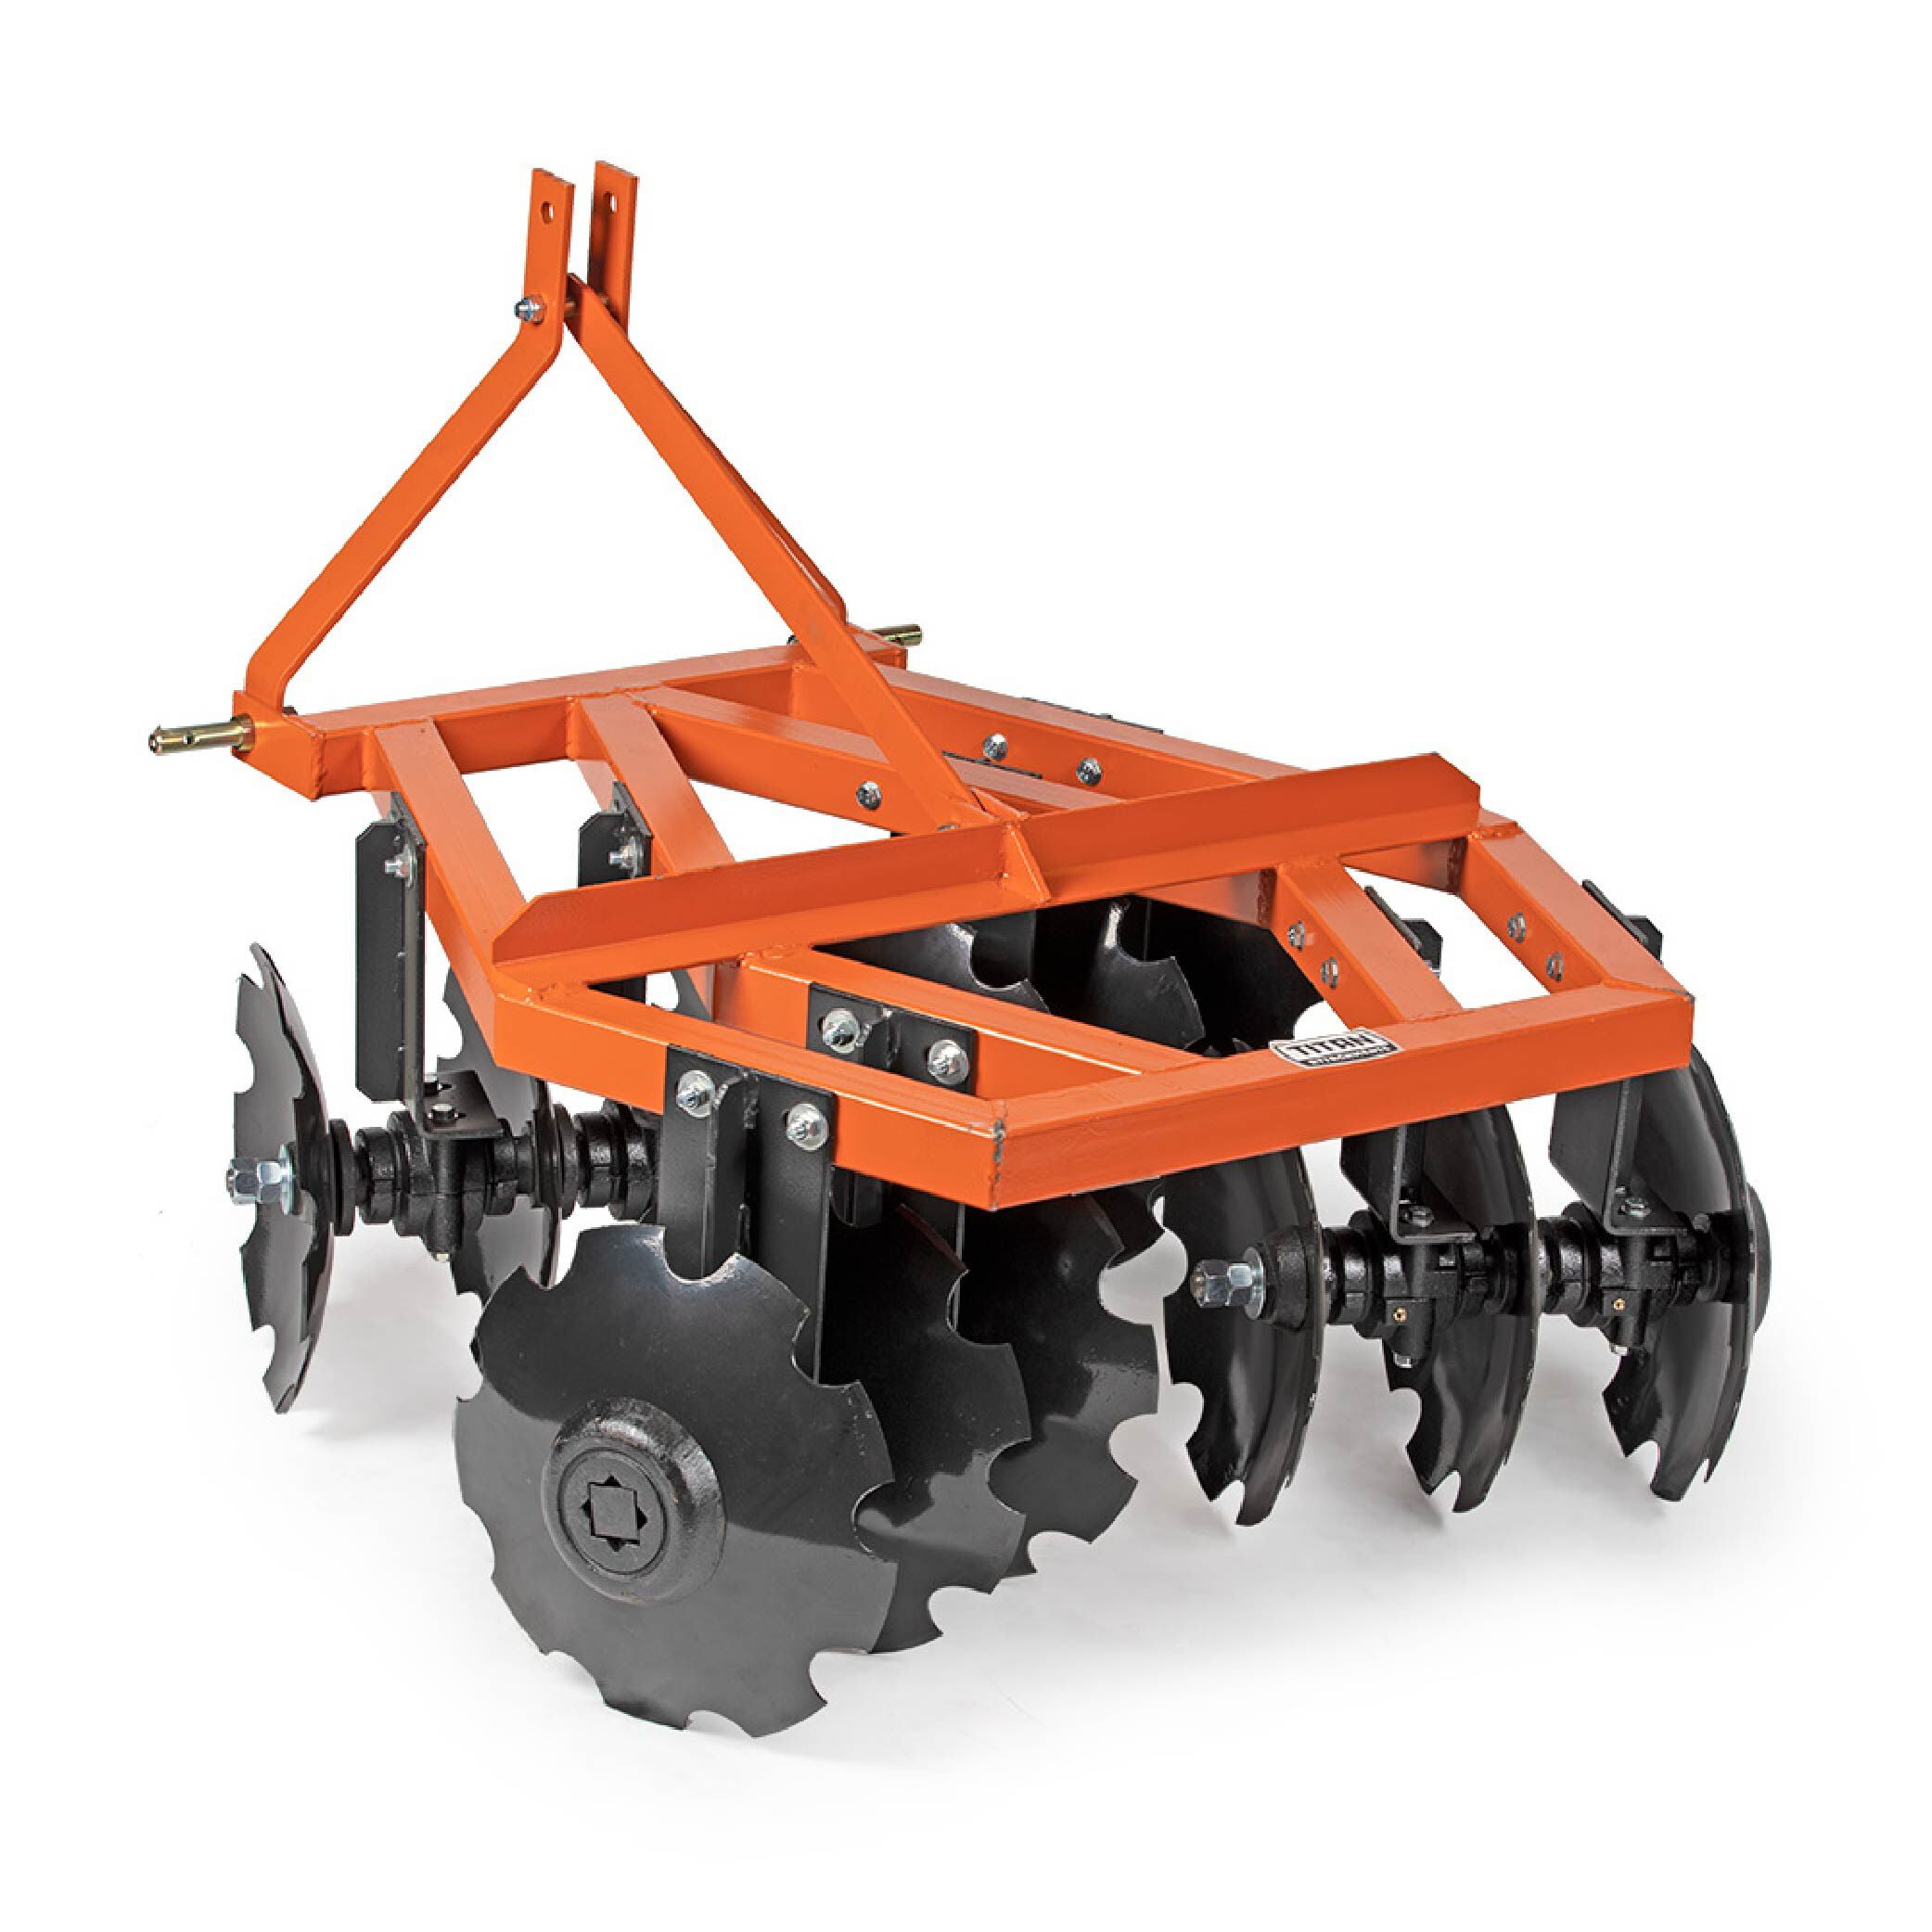
- ✦ Three-point disc harrows
These attach directly to the tractor’s three-point hitch. They are popular with compact and utility tractors because they are easy to raise, transport, and store.
- ✦ Pull-type disc harrows
These use a drawbar or similar connection and may cover more ground. They are often suited to larger tractors and larger fields.
- ✦ Offset disc harrows
The offset design can create strong cutting action and may work well where deeper or more aggressive tillage is needed.
- ✦ Tandem disc harrows
Tandem layouts use blade gangs arranged to provide a balanced tillage pattern. They are common for seedbed preparation and residue management.
- ✦ Heavy-duty discs
Heavy-duty models use stronger frames, larger blades, added weight, or other features for demanding soil conditions and heavier residue.
Disc Harrow vs. Disc Plow
A disc harrow is mainly a soil finishing and conditioning tool. It can break clods, mix residue, cut small weeds, and prepare the surface for planting. A disc plow is generally built for more aggressive primary tillage and deeper soil cutting.
These tools can overlap in some uses, but they are not direct substitutes. If your main goal is a smooth seedbed after another tillage pass, a disc harrow may fit better. If you need a heavier tool for difficult ground, a disc plow or heavy offset disc may be more appropriate.
- ✦ Choose a harrow for
Seedbed preparation, residue mixing, shallow tillage, light weed control, and surface leveling.
- ✦ Choose a plow-style disc for
Heavier soil cutting, tougher ground, deeper tillage, and demanding primary soil work.
Notched vs. Smooth Discs
Notched disc blades have teeth or cuts around the edge. These edges can help the blade grip and cut through crop residue. Smooth blades can give a cleaner rolling action and work well in many general tillage conditions.
Neither design is right for every field. Heavy residue may favor a notched blade, while a smooth blade can make sense when residue is lighter and soil finishing is the main goal.
- ✦ Notched blades
Useful when residue cutting and aggressive soil entry are important.
- ✦ Smooth blades
Useful for general soil work and finishing where a less aggressive edge is preferred.
What Can Discs & Attachments Do?
The main benefit of Discs & Attachments is their ability to handle several soil tasks with one tractor. A disc can cut into the upper soil layer, mix plant residue, break clods, and disturb small weeds. This makes it useful before planting and in some land maintenance work.
The exact result depends on the machine and setup. A light disc may make only a shallow pass, while a heavy machine can work much deeper. Soil moisture also matters. Soil that is too wet can smear, while soil that is too dry can demand much more power.
On small U.S. properties, compact discs can also help with food plots, pasture renovation, drive areas, and garden preparation. The same basic machine can serve several jobs when the tractor and attachment are correctly matched.
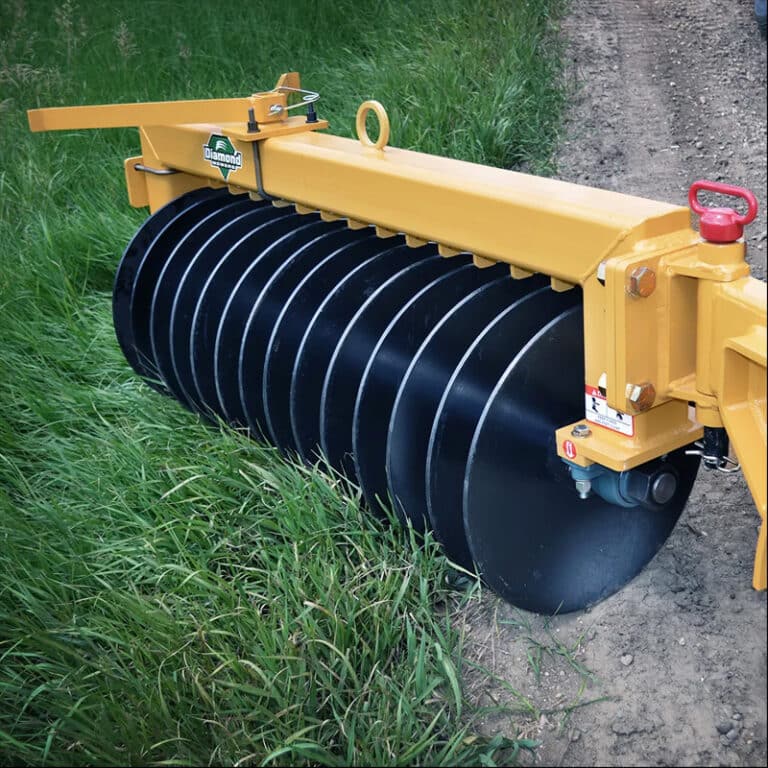
- ✦ Seedbed preparation
Discs can break larger clods and help create a more even soil surface before planting.
- ✦ Residue management
Disc blades can cut and mix crop residue into the upper soil layer, depending on blade design and working depth.
- ✦ Weed control
A disc can disturb young weeds and cut plant roots during suitable tillage passes.
- ✦ Soil mixing
Discs can blend residue, soil, and other surface material through the worked layer.
- ✦ Land leveling
A well-set disc can help smooth uneven soil after heavier work, although a dedicated land-leveling tool may be better for precise grading.
When a Disc Is Not the Right Tool
A disc is not a cure for every soil problem. It may not be the best choice for precise grading, deep subsoil compaction, rock removal, or finish work that needs a very flat surface. Repeated discing can also disturb soil more than needed in some farming systems.
Think about the problem first. If the issue is a hard layer below normal disc depth, a different tillage tool may be needed. If the goal is only to level a surface, a land plane or similar attachment may provide better control.
- ✦ Deep compaction
A disc harrow is usually not designed to solve deep compaction. A tool made for deeper soil work may be more suitable.
- ✦ Fine grading
A box blade, land plane, or grading attachment may provide better control for detailed surface shaping.
- ✦ Very wet soil
Working wet ground can cause smearing and poor soil structure. Waiting for suitable conditions can produce a better result.
How to Choose the Right Discs & Attachments
Choosing Discs & Attachments starts with the tractor, not the attachment catalog. Check the tractor’s rated lift capacity, horsepower range, hitch category, hydraulic needs, and operating weight. Then compare those limits with the implement manufacturer’s requirements.
Working width is another major factor. A wider disc can cover more ground per pass, but it also increases the load on the tractor. A smaller disc may take more passes but can be easier to pull, transport, and control.
For a homeowner or small farm operator, it is often better to choose a manageable attachment that can work well in real conditions. For commercial work, productivity and field capacity become more important, but the same basic rule applies: match the tool to the tractor and job.
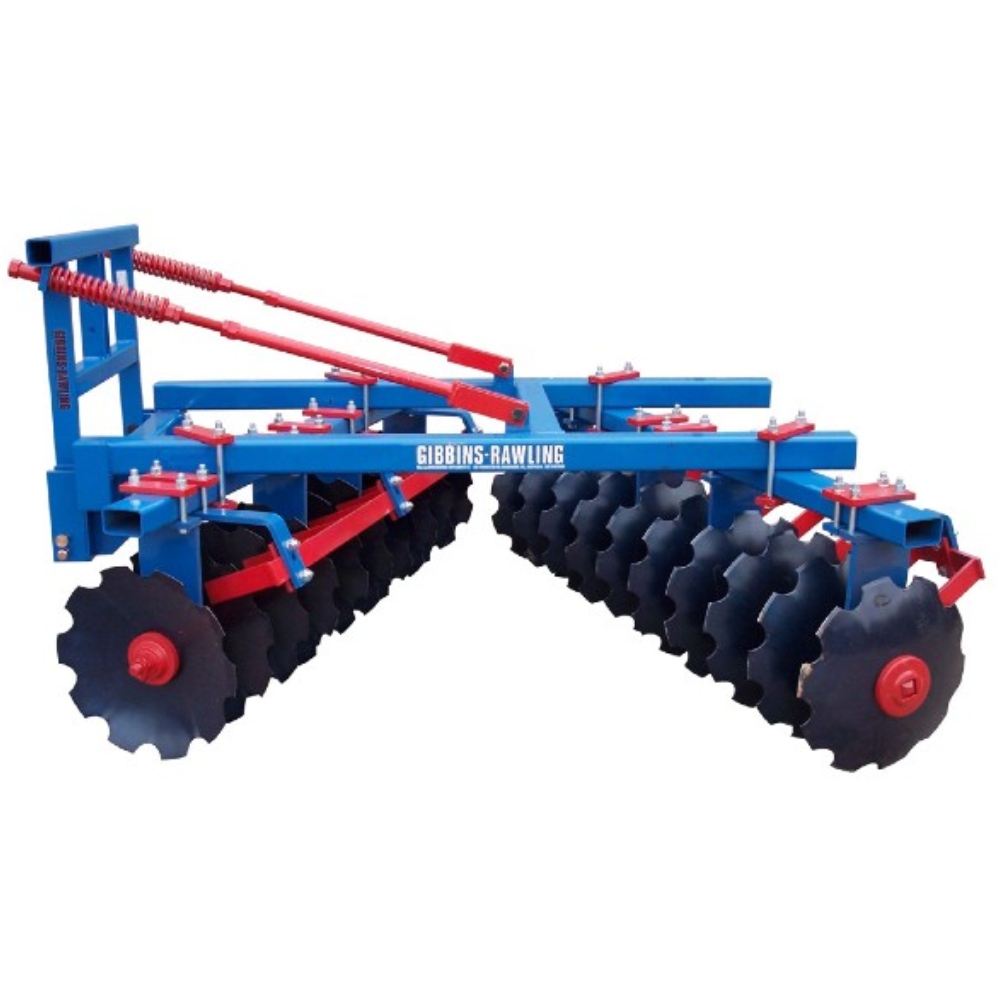
- ✦ Check tractor horsepower
Use the implement maker’s recommended tractor range as a starting point. Do not assume that a tractor can pull an attachment simply because the hitch can physically connect to it.
- ✦ Check hitch category
Confirm that the attachment matches the tractor’s three-point hitch category and connection points.
- ✦ Check lift capacity
The tractor must safely lift and carry the implement, especially when the attachment is raised for transport.
- ✦ Choose the working width
Pick a width that gives useful coverage without placing too much load on the tractor.
- ✦ Consider soil type
Hard clay, sandy soil, loam, rocky ground, and residue-heavy fields can require different blade sizes, weights, and disc designs.
- ✦ Consider transport
Make sure the attachment can be moved safely through gates, roads, sheds, and other areas on your property.
Weight Matters
Attachment weight affects how deeply the blades can enter the soil, but more weight is not always better. Too much weight can overload a small tractor and increase traction problems. It can also make transport and storage harder.
A useful setup balances weight, blade size, width, and tractor power. The goal is enough pressure for the required work without pushing the machine beyond its safe operating range.
- ✦ Light attachment
Often easier for compact tractors and lighter soil work, gardens, food plots, and maintenance passes.
- ✦ Medium attachment
A flexible choice for many utility tractors and mixed land-preparation tasks.
- ✦ Heavy attachment
Designed for stronger tractors and more demanding soil conditions, with greater demands on lift and traction.
Blade Size and Spacing
Blade diameter, thickness, spacing, and concavity all affect how a disc behaves. A larger blade can offer more cutting capacity and clearance. A thicker blade may better handle demanding work, but it also adds weight.
Do not judge a disc by blade size alone. The frame, bearing quality, gang design, hitch, and total machine weight all matter. Two attachments with similar widths can perform very differently.
- ✦ Large blades
Can provide more clearance and cutting capacity for heavier applications.
- ✦ Thicker blades
Can offer greater durability in demanding work, depending on steel quality and operating conditions.
- ✦ Closer spacing
Can help create a more uniform worked surface in suitable soil.
How to Set Up Discs & Attachments for Better Results
Even a good disc can perform poorly if the setup is wrong. Before entering the field, inspect the hitch, blades, bearings, frame, and adjustment points. Make sure the implement sits correctly behind the tractor and that the tractor can control it safely.
Working depth should match the task and field conditions. Start with a moderate depth and check the soil after a short pass. If the disc leaves the right amount of residue and produces the desired surface, there may be no reason to go deeper.
Travel speed also matters. Going too fast can cause uneven soil movement and poor penetration. Going too slowly may reduce field capacity without improving the result. Use the speed range recommended for the implement and adjust based on field conditions.

- ✦ Start shallow
Make a short test pass before working the full field. Increase depth only when the tractor and soil conditions allow it.
- ✦ Check the surface
Look at soil mixing, clods, residue, and depth after the first pass.
- ✦ Keep the implement level
A level frame can help the disc gangs work more evenly and reduce inconsistent cutting.
- ✦ Avoid excessive wheel slip
Too much slip wastes power and can damage soil. Reduce depth or adjust the setup when the tractor struggles for traction.
- ✦ Make clean passes
Use a consistent path and suitable overlap so strips of untreated soil are not left between passes.
Working Depth
The right depth depends on the task, disc design, soil, and residue. Deeper is not automatically better. Excessive depth can increase draft, fuel use, and soil disturbance while reducing tractor performance.
A simple field check can help. Stop after a short pass, inspect the worked layer, and decide whether the result meets the goal. This practical check is often more useful than trying to force a fixed depth in every field.
- ✦ Shallow pass
Useful for light residue mixing, shallow weed control, and finishing work.
- ✦ Medium pass
Can suit general seedbed preparation and moderate residue incorporation.
- ✦ Deep pass
Should only be used when the implement and tractor can handle the added draft and the job truly requires it.
Soil Moisture
Soil moisture has a major effect on disc performance. When soil is too wet, the blades can smear and create compacted or glazed surfaces. When soil is extremely dry, the tractor may need much more power to achieve the same depth.
A short test pass is a simple way to judge conditions. If the soil sticks to the blades or forms long smeared surfaces, conditions may be too wet. If the disc barely enters the soil and the tractor struggles, the ground may be too dry or the setup may be too aggressive.
- ✦ Too wet
May lead to smearing, sticking, poor structure, and unwanted compaction.
- ✦ Too dry
May increase draft and make it harder for the blades to penetrate.
- ✦ Suitable moisture
Usually allows the blades to cut and move soil without excessive sticking or power demand.
Using Discs & Attachments Safely
Discs & Attachments contain heavy steel parts that can move with great force. Safe operation starts before the tractor moves. Read the tractor and implement manuals, understand the controls, and keep people away from the work area.
Never work under a raised implement unless it has been properly supported with equipment designed for that purpose. Hydraulic systems can lose pressure. A hydraulic cylinder or three-point hitch should not be treated as a safe support by itself.
Transport also needs care. Raise the implement only as much as needed, keep the tractor stable, and follow applicable road and farm safety rules. Before entering public roads, check local requirements for width, lighting, marking, and transport equipment.

- ✦ Keep bystanders away
People should stay clear of the tractor and attachment while the machine is operating or moving.
- ✦ Stop before servicing
Shut down the tractor, lower the attachment safely, remove the key when appropriate, and follow the equipment maker’s service procedure before inspection or repair.
- ✦ Use proper support
Never rely only on hydraulic pressure to hold a raised attachment during maintenance.
- ✦ Inspect before use
Look for loose bolts, damaged blades, worn bearings, cracked welds, damaged hydraulic parts, and other problems.
- ✦ Transport with care
Check stability, clearance, visibility, and local transport rules before moving the attachment over roads or between work areas.
Common Safety Mistakes
One common mistake is making adjustments while the disc is still connected to a running tractor. Another is standing near the attachment while someone else operates the hydraulic controls. These actions can turn a small adjustment into a serious accident.
Another mistake is ignoring the tractor’s stability. A heavy attachment raised high can change the tractor’s center of gravity. Keep loads low during transport and follow the tractor maker’s instructions for ballast and safe operation.
- ✦ Do not adjust moving equipment
Stop the machine and secure it before changing settings or clearing material.
- ✦ Do not stand between unsafe connection points
Use safe hitching practices and keep clear of pinch points.
- ✦ Do not ignore unusual noise
Grinding, knocking, or repeated vibration can point to a loose, worn, or damaged part.
Maintenance and Storage of Discs & Attachments
Regular maintenance keeps Discs & Attachments working smoothly and can prevent small problems from becoming expensive repairs. After use, remove packed soil and crop residue so you can inspect the blades, bearings, frame, and hitch.
Pay special attention to bearings and other moving parts. Follow the manufacturer’s lubrication schedule and use the specified lubricant. A bearing that runs hot, makes noise, or shows excess play deserves attention before the next major field job.
Disc blades also wear over time. As the edge becomes worn or the blade loses its useful shape, soil penetration and cutting action can change. Replace worn or damaged parts according to the implement manufacturer’s instructions rather than waiting for a failure in the field.

- ✦ Clean after use
Remove soil, plant material, and debris from the frame and moving parts before storage.
- ✦ Inspect blades
Check for cracks, bends, severe wear, and other damage.
- ✦ Check bearings
Look for noise, heat, looseness, or other signs of wear and follow the service schedule.
- ✦ Check fasteners
Inspect nuts, bolts, pins, and other connection hardware and tighten or replace them as required.
- ✦ Protect the machine
Store the attachment on stable ground under suitable cover when possible, and protect exposed parts from unnecessary moisture.
Signs Your Disc Needs Service
Uneven tillage is often an early warning sign. If one side cuts deeper than the other, the frame may not be level, a gang may need adjustment, or a component may be worn. Excessive vibration can also point to a damaged blade, bearing, or loose hardware.
Do not ignore these signs. A worn part can place extra stress on nearby parts. Fixing a small issue early is usually simpler than repairing a larger failure after a long day in the field.
- ✦ Uneven depth
May indicate incorrect setup, uneven wear, or a frame or gang adjustment issue.
- ✦ Excessive vibration
Can indicate a damaged blade, bearing problem, loose hardware, or another mechanical issue.
- ✦ Poor residue cutting
May result from worn blades, unsuitable blade type, incorrect depth, or field conditions.
- ✦ Poor penetration
Can come from worn blades, insufficient weight, incorrect setup, hard soil, or inadequate tractor power.
Storage Between Seasons
Seasonal storage gives you a good chance to prepare the attachment for the next job. Clean it well, inspect all major components, lubricate the parts specified by the manufacturer, and repair known problems before storing it.
Keep the attachment stable and protected from unnecessary weather exposure. A short maintenance check before storage can save time when the next planting or land-preparation window arrives.
- ✦ Clean and dry
Remove soil and residue, then allow the attachment to dry before long-term storage.
- ✦ Repair known faults
Fix worn bearings, damaged blades, loose hardware, and other issues before the next season.
- ✦ Store securely
Park the attachment on stable ground where it cannot roll, fall, or create a hazard.
New vs. Used Discs & Attachments
Both new and used Discs & Attachments can make sense. A new implement gives you access to current specifications, new components, and manufacturer support. A used disc may cost less and can be a practical option when the frame and working parts remain in good condition.
When buying used equipment, inspect the parts that are expensive or difficult to replace. Look closely at the frame, gang assemblies, bearings, blades, hitch, and adjustment mechanisms. A low purchase price can become expensive if several major components need replacement.
Ask for the implement’s model number and specifications when possible. This makes it easier to check working width, blade size, replacement parts, hitch requirements, and the tractor range recommended by the manufacturer.
- ✦ Inspect the frame
Look for cracks, bends, poor repairs, or damaged welds that may affect strength and alignment.
- ✦ Measure blade wear
Compare blade condition with the manufacturer’s service guidance when available.
- ✦ Check bearings
Worn bearings can add repair costs and may affect smooth operation.
- ✦ Check the hitch
Confirm that pins, brackets, and connection points are sound and compatible with your tractor.
- ✦ Price replacement parts
Before buying used equipment, estimate the cost of blades, bearings, hardware, and other likely service items.
What to Inspect Before Buying Used Equipment
Start with the frame because major structural damage can be costly to correct. Then inspect the disc gangs and rotate or move components only when the machine is safely secured. Look for excessive play, uneven wear, missing hardware, and signs of poor repairs.
Also check whether replacement parts are still available. An inexpensive used attachment can become difficult to maintain if key parts are obsolete or hard to source.
- ✦ Frame condition
Look for cracks, bends, broken welds, and repairs that may affect structural integrity.
- ✦ Gang condition
Check the blade gangs for wear, damage, loose parts, and signs of poor alignment.
- ✦ Parts availability
Confirm that common wear parts can still be obtained before committing to the purchase.
Common Problems With Discs & Attachments
Many disc problems come from a mismatch between the attachment and the job. A disc that is too wide or heavy for the tractor may struggle to reach the desired depth. A disc that is too light may fail to penetrate hard soil.
Setup errors can also create uneven results. If one side works deeper than the other, check the hitch, frame level, gang settings, tire pressure, and wear before assuming the disc itself is defective.
Field conditions matter just as much. Wet soil, dry soil, heavy residue, rocks, and uneven terrain can change how the attachment behaves. Good operators adjust their approach instead of forcing the same setting in every condition.
- ✦ Poor penetration
Check tractor power, attachment weight, blade condition, working depth, and soil moisture.
- ✦ Uneven tillage
Check leveling, hitch setup, blade wear, gang adjustment, and tire pressure.
- ✦ Excessive tractor strain
Reduce working depth, check soil conditions, and confirm that the attachment is within the tractor’s recommended capacity.
- ✦ Residue plugging
Check blade type, spacing, residue volume, operating speed, and field conditions.
- ✦ Excessive wear
Inspect bearings, blades, fasteners, and alignment, and follow the manufacturer’s maintenance schedule.
How to Improve a Poor Field Result
Do not change several settings at once. Make one adjustment, run a short test pass, and inspect the soil. This makes it much easier to understand what helped.
For example, if the disc is not cutting well, first check blade condition and soil moisture. If the blades are sound and the soil is workable, then review depth, weight, leveling, and travel speed.
- ✦ Change one setting
A single adjustment at a time makes troubleshooting much easier.
- ✦ Test a short area
Use a small section of the field to evaluate the new setup before making a full pass.
- ✦ Inspect the soil
Check depth, clods, residue mixing, weeds, and surface finish after each test.
Tips for Getting Better Results From Discs & Attachments
Good disc work comes from matching the machine to the field and making small, informed adjustments. There is no single setting that works for every tractor, soil, crop, and season.
For routine work, keep a simple record of the attachment, depth, speed, soil condition, and result. Over time, this creates a useful reference for your own land. Experience becomes much more valuable when you can connect a setting with an actual field result.
The same principle applies to maintenance. A quick inspection before each major job can reveal loose hardware, worn blades, or damaged bearings before they cause downtime.
- ✦ Match the tool to the task
Use a light finishing disc for light work and a properly rated heavy disc for demanding soil conditions.
- ✦ Avoid unnecessary depth
Work only as deep as the job requires and the tractor can handle efficiently.
- ✦ Watch soil moisture
Choose workable conditions to reduce smearing, excessive draft, and poor soil structure.
- ✦ Inspect often
Check blades, bearings, fasteners, frame parts, and hitch components before and after demanding work.
- ✦ Keep notes
Record useful settings and field results so you can repeat successful setups later.
- ✦ Plan for parts
Keep common wear parts available when possible, especially during busy field seasons.
A Simple Pre-Work Checklist
A short checklist can prevent many avoidable problems. Before starting, inspect the attachment while it is safely parked and disconnected from active operation. Confirm that the tractor and implement are compatible and that all required safety equipment is in place.
After the first short pass, stop and inspect the result. If the soil looks right and the machine runs smoothly, continue. If not, make a controlled adjustment before covering more ground.
- ✦ Before starting
Check blades, bearings, bolts, pins, frame, hitch, tires, fluids, and other items required by the tractor and implement manuals.
- ✦ During the test pass
Watch tractor load, wheel slip, disc behavior, residue flow, and soil finish.
- ✦ After the test pass
Inspect the worked depth and surface before continuing across the field.